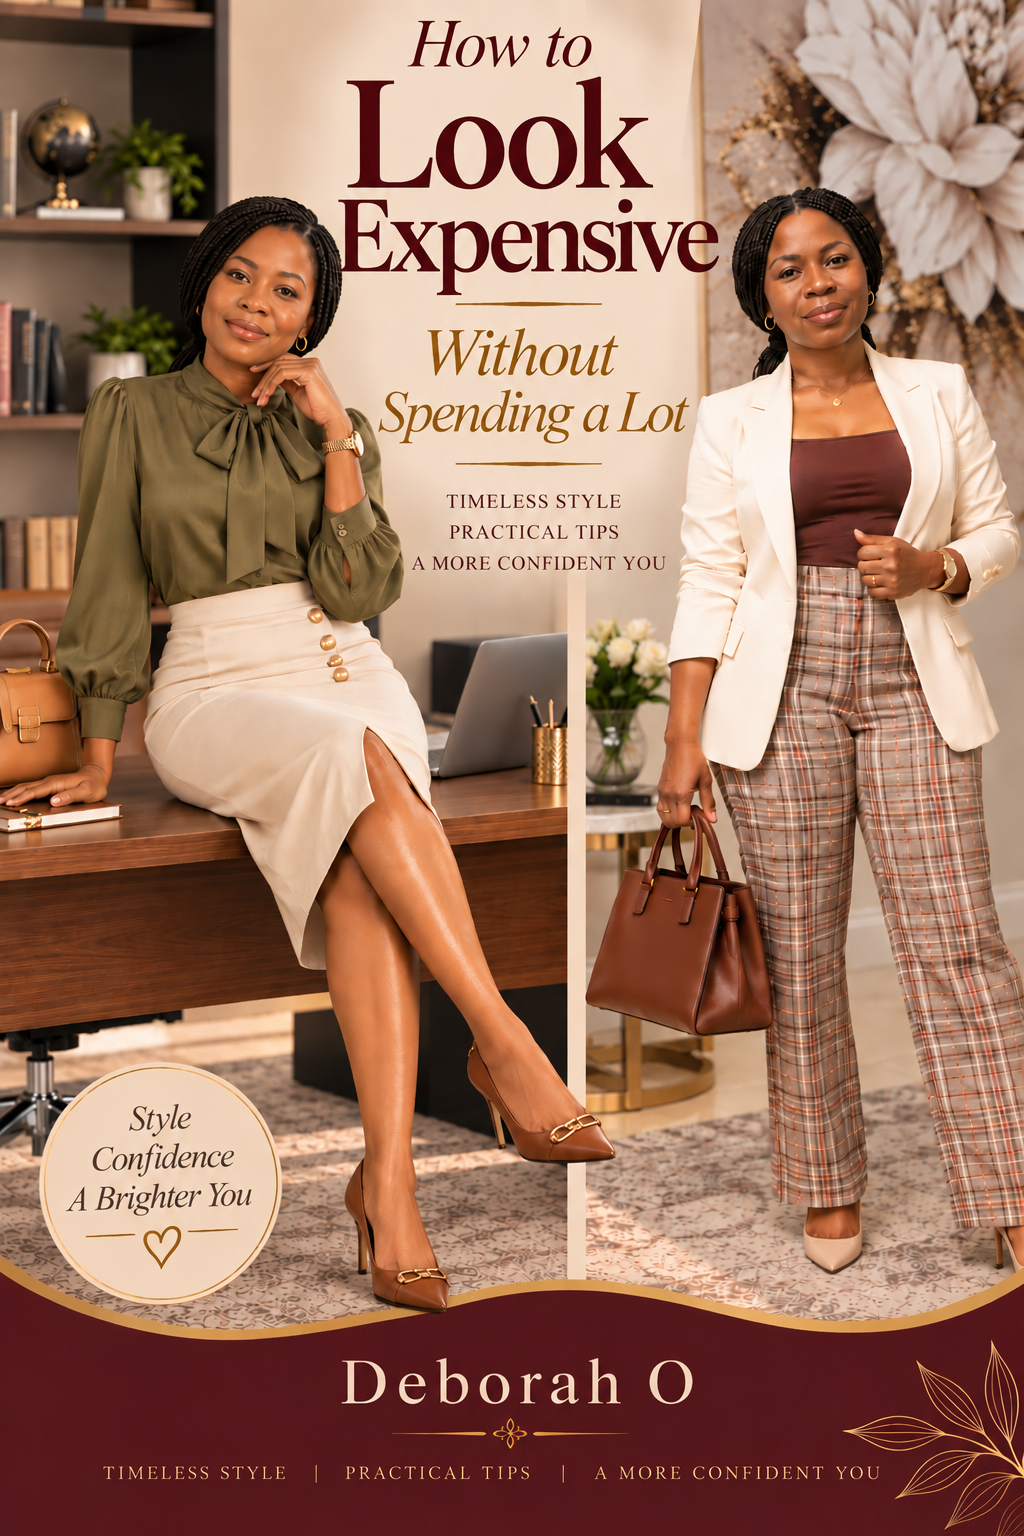
How to Look Expensive Without Spending a Lot — The Affordable Elegance Method
How to Look Expensive Without Spending a Lot — cover

A Note From Deborah

I want to start by telling you exactly where this guide came from, because I think you deserve to know before you spend a single page reading it.

I grew up in Africa, where looking neat was treated as a form of self-respect, not vanity. The women around me did not have overflowing wardrobes. They pressed their clothes. They chose their colors with care. They groomed themselves neatly and carried what they wore with quiet confidence. Nobody around me was rich. Everybody still managed to look put-together.

When I moved to the United States, life got busier in a way I was not prepared for. Work, marriage, motherhood, bills, family responsibilities — every dollar suddenly had somewhere important to go, and buying new clothes constantly was no longer something I could justify. I still wanted to look elegant. I just could not afford to solve that want the way I used to.

For a long time, I told myself I would return to "looking good" later, once things settled down. Later kept moving.

My breaking point came on an ordinary Sunday morning. We were getting ready for church, and everyone else was already waiting on me. Clothes covered the bed. I had tried on four different outfits and disliked every single one. Then I found a dress I had bought only a few weeks earlier, the tag still attached, completely forgotten. I sat on the edge of the bed holding that tag, and it hit me that it was not really about the dress. It represented every hopeful, random thing I had bought without any real plan behind it.

My husband gently said, "We have to leave." I looked at the clothes scattered around me and said, more to myself than to him, "I cannot live like this anymore." I was tired of wasting time. Tired of spending money I did not need to spend. Tired of believing the next purchase would somehow solve a problem I did not even understand yet.

That Sunday morning is what finally sent me looking for a real answer, instead of another new outfit. I started asking a different question: instead of "what can I buy," I began asking "what can I create with what I already own." That question sent me researching color pairing, studying how fit actually works on real bodies, testing accessory combinations, learning to spot fabric quality, and eventually having a conversation with my aunty that reorganized everything I had learned into one clear, usable method.

I did not build this guide from theory. I built it from years of trial, error, uncomfortable mornings, wasted purchases, and eventually, real results — first in my own mirror, then in the outfits of the women I quietly shared this method with afterward.

Everything you are about to read has been tested on an actual wardrobe, on an actual budget, under actual time pressure. Nothing here is filler, and nothing here requires you to spend money you do not have.

How to Use This Guide

Read the whole guide once, in order, before trying to apply everything at once. Each chapter builds on the one before it — fit before color, color before accessories, and so on. Once you've read it through, come back to the tools and the cheat sheet as your quick references whenever you're getting dressed.

You do not need to master every detail overnight. You only need to start noticing them. That noticing is where everything else begins.

Contents

  • A Note From Deborah & How to Use This Guide
  • Chapter 1 — The Five Details That Instantly Elevate Any Outfit
  • Chapter 2 — The Perfect Fit Secret
  • Chapter 3 — Elegant Color Combinations Without Buying Anything New
  • Chapter 4 — The Simple Accessory Rule
  • Chapter 5 — Styling Mistakes That Make Even Expensive Clothes Look Cheap
  • Chapter 6 — Strategic Shopping on a Limited Budget
  • Chapter 7 — Grooming and Finishing Touches
  • Bonus 1 — The Expensive-Looking Outfit Formula Cheat Sheet
  • Bonus 2 — The 7-Day Look-Put-Together Challenge
  • Closing Note From Deborah
  • What Women Are Saying
  • Affordable Elegance Action Workbook
THE AFFORDABLE ELEGANCE METHOD
CHAPTER ONE

The Five Details That Instantly Elevate Any Outfit

Let me tell you something I wish someone had told me years ago.

Looking expensive has almost nothing to do with how much you spent. I know that sounds like something people say to make you feel better about a smaller budget. It is not. It is the actual truth I learned the hard way, standing in front of my own overflowing wardrobe, convinced I owned "nothing to wear," even though the closet was, quite literally, full.

I did not need more clothes. I needed a system. And once I found it, I realized it was not complicated at all — it was just something nobody had ever explained to me in one place.

So before we talk about fit, or color, or accessories in detail, I want to give you the whole picture first. There are five details that separate an outfit that looks thrown together from one that looks intentional. I did not invent these five details out of nowhere — they came out of months of paying close attention to the women I considered effortlessly elegant, and noticing what they consistently got right that I was consistently getting wrong.

Once you can see these five details, you cannot unsee them. You will start noticing them on other women without even trying. You will start noticing when they are missing from your own outfit before you even leave the house, which is exactly the instinct we are building toward.

Here they are, one at a time.

1. Fit

Not size. Fit. A blouse can be your correct size on the tag and still fit you badly — pulling at the buttons, drowning your shoulders, bunching awkwardly at the waist. This is the detail I underestimated the longest, because I assumed if the size was right, the fit was automatically right too. It is not. We will go deep into fit in Chapter 2, because I believe it is the single most underrated detail in this entire method. For now, just hold onto this: nothing ages an outfit faster than clothes that do not sit right on your particular body.

2. Color harmony

This is not about memorizing color theory or owning a color wheel app. It is about choosing colors that agree with each other instead of quietly competing for attention. A polished woman is rarely wearing five different colors at once. She is usually wearing two, maybe three, working together on purpose, even if she never consciously thought about why it worked. We will build this skill properly in Chapter 3.

3. Condition and care

Wrinkled fabric. Faded color. Bobbled knitwear. Scuffed shoes. This is the detail people notice without ever realizing they noticed it — it registers as a feeling, not a specific observation. A five-dollar top that is clean, pressed, and cared for will always look more expensive to the eye than a fifty-dollar top that looks tired and neglected.

4. Grooming

Your outfit is not the only thing people see, even though it is easy to focus all your attention there. Neat hair, clean nails, a fresh, rested-looking face — these finish the picture your clothes started. You do not need an elaborate routine here. You need a consistent one, which we'll build in Chapter 7.

5. Restraint

This is the detail that surprised me the most, because it went against everything I assumed about "dressing up." Elegant women are not wearing everything they own at once. One statement piece. One focal point. Everything else supports it quietly, almost invisibly. More is rarely more. More is usually just more — more noise, more clutter, less clarity about what you're actually trying to say with the outfit.

That is it. Fit. Color. Condition. Grooming. Restraint. Five things. Not fifty, not some overwhelming checklist requiring a whole closet overhaul. Five things you can start applying today, with clothes you already own.

The 5 Details icon chart

YOUR QUICK WIN — DO THIS BEFORE YOU READ ANY FURTHER

I do not want you to just read this chapter and move on, filing it away as "interesting" and forgetting it by tomorrow. I want you to feel a real difference today, in the next ten minutes, before you keep reading a single page further.

Here is what I want you to do right now.

Go to your wardrobe and pull out one outfit you already planned to wear this week — nothing special, nothing new, just something ordinary and already in rotation. Lay it out, or put it on if you can.

Now run it through the five details, one at a time, slowly:

  • Fit — Is anything pulling, gaping, or hanging in a way that does not flatter you? If yes, is there a quick fix available right now — tucking it in, rolling the sleeves, belting the waist?
  • Color — Are you wearing more than three colors right now? If so, could you remove one item to simplify the palette?
  • Condition — Is everything clean and pressed? If something is wrinkled, is there time to iron or steam it before you wear it today?
  • Grooming — Does your hair, skin, or nails need five minutes of attention to match the effort of the outfit?
  • Restraint — Are you wearing more than one "statement" piece at once? If so, choose your favorite one and set the rest aside for today.

Make one change. Just one. Fix the fit, remove one color, or take off one accessory. Do not try to fix all five at once — that is not the point of this exercise.

Then look in the mirror.

That small shift you just felt — that is not luck, and it is not about money. That is the Affordable Elegance Method already working, even before we go a single page deeper into the details. I promise you, it only gets clearer and more automatic from here.

YOUR ACTIONABLE STEP: THE 5-DETAIL AUDIT

I want you to keep this checklist somewhere you will actually see it every day — the inside of your wardrobe door, a note on your phone lock screen, a sticky note on your mirror, wherever genuinely works for your life. Before you leave home each day, run through it quickly:

  • Fit — Does everything sit correctly on my body right now, today?
  • Color — Am I wearing colors that work together, not against each other?
  • Condition — Is everything clean, pressed, and visibly cared for?
  • Grooming — Do I look as put-together as my outfit is trying to look?
  • Restraint — Have I let one piece lead the outfit, instead of everything competing for attention at once?

This is not about achieving perfection every single morning of your life. Some days you will only have time to fix one thing on this list, and that is still real progress, not failure. Over time, this audit will stop being something you consciously think through and start being simply how you get dressed, without even reaching for the checklist anymore.

In the next chapter, we slow down on that very first detail — fit — because it deserves far more than a quick summary. I am going to walk you through exactly how to check it, every time, without guessing.

THE AFFORDABLE ELEGANCE METHOD
CHAPTER TWO

The Perfect Fit Secret

I mentioned in the last chapter that fit matters more than almost anything else in your wardrobe. Now I want to slow all the way down and show you exactly why, because I genuinely believe this is the most underrated detail in the entire method — the one that quietly does more work than color, accessories, or anything else we will cover.

Here is something I did not understand for years, and it took me embarrassingly long to figure out: two women can wear the exact same blouse, in the exact same size, and one will look effortlessly polished while the other looks unfinished and slightly uncomfortable. The difference is almost never the blouse itself. It is the fit.

I used to think fit and size were the same thing. They are not. Fit is not the number printed on the tag. It is how the fabric actually sits on your particular body, today, right now, in this season of your life. A "medium" that fit you perfectly two years ago might pull differently across your shoulders now, or hang differently at your hips. A dress that looked flawless on the mannequin in the store might sit completely differently once it is on your real, moving, breathing body. None of this is a flaw in you. It is simply a mismatch between the garment and your body in this specific moment, and mismatches like this are almost always fixable — often without spending a single extra dollar on new clothes.

Why Fit Matters More Than Fabric or Brand

When something fits well, your eye reads it as intentional, as if it was made specifically for you, even if it came from the clearance rack. When something fits badly, your eye reads it as an accident — something grabbed in a hurry, something that does not quite belong — even if the fabric is beautiful and the color is exactly right.

Think about it this way for a moment. A well-fitted, plain white cotton shirt will almost always look more expensive to the eye than a designer blouse that pulls awkwardly at the buttons or hangs shapelessly off the shoulders. Fit is the very first thing people notice about an outfit, even if they could never quite tell you why an outfit looks "off" or "not quite right." Most people cannot name what bad fit looks like. They can only feel that something is wrong.

This is exactly why my aunty's advice stuck with me so deeply, and why I still think about it years later. She never once mentioned a brand name, a price tag, or a trend. She talked about the line of a shoulder seam. She talked about where a waistband should sit. She was talking about fit the entire time — she simply never used that specific word, because to her, it was not a technical concept. It was just common sense, the kind of thing her own mother had taught her.

What Good Fit Actually Looks Like

You do not need a sewing background, a tailoring certificate, or years of experience to spot bad fit. You just need to know precisely where to look, and once you know, you will start seeing it everywhere — in your own mirror and in other people's outfits alike.

  • At the shoulders — the seam of a top should sit right at the edge of your shoulder bone, not halfway down your upper arm, and not pulling up uncomfortably toward your neck.
  • At the waist — if a top, dress, or jacket has any defined waist shaping, it should sit at your natural waistline, not riding up toward your ribs or drooping down toward your hips.
  • At the hem — sleeves and trouser hems should end at a deliberate, chosen point on your body, not an accidental one.
  • Across the chest and back — this is the one most women miss. Watch closely for pulling, gaping between buttons, or fabric that strains uncomfortably when you move naturally, reach, or sit down.

Cheap, Fast Fixes for Common Fit Problems

  • Tucking — a shirt that runs slightly too long or boxy often transforms completely the moment you tuck it in.
  • Belting — adding a belt at your natural waist instantly creates shape and structure.
  • Rolling — sleeves that run a little too long can be rolled once or twice to create a cleaner line.
  • Tailoring — for pieces you genuinely wear often, a small tailoring investment is almost always cheaper long-term than replacing the item entirely.
Front, side, back fit-check diagram

TOOL: THE 60-SECOND FIT-CHECK METHOD

  1. Step 1 — Front check (15 sec): Shoulders sitting correctly? Any pulling across chest or stomach?
  2. Step 2 — Side check (15 sec): Hemline at a flattering point? Waist defined, not hidden?
  3. Step 3 — Back check (15 sec): Any pulling or bunching you can't see from the front?
  4. Step 4 — Movement check (15 sec): Raise your arms, sit down. Does everything still sit correctly?

If you discover a problem during any of these four steps, go straight back to the fixes above. Tuck it. Belt it. Roll it. Or simply make a mental note that this particular piece is a strong candidate for a visit to a tailor.

YOUR ACTIONABLE STEP

Choose three items you wear often — one top, one pair of trousers, and one dress or skirt. Run each one through the full 60-Second Fit-Check today, without skipping any of the four steps.

For anything that fails the check, apply one fix immediately: tuck it, belt it, or roll it. For anything that keeps failing no matter what small fix you try, set it aside honestly as a tailoring candidate.

In the next chapter, we build directly on this foundation. Once your clothes fit you properly, color becomes the very next detail that instantly signals elegance to anyone looking at you.

THE AFFORDABLE ELEGANCE METHOD
CHAPTER THREE

Elegant Color Combinations Without Buying Anything New

Once fit is right, color is the very next thing people notice about an outfit — often before they even consciously register what specific pieces you are wearing. The eye processes color before it processes detail, which is exactly why getting this one thing right carries so much visual weight.

I used to think color was the hardest, most mysterious part of getting dressed well. I would stand in front of my wardrobe, completely convinced that nothing "matched," even though I owned plenty of genuinely beautiful individual pieces. What I did not understand yet, and what took me an embarrassingly long time to learn, was that matching was never actually the goal I should have been chasing. Harmony was the real goal. And harmony, it turns out, is far more forgiving and far more achievable than strict matching ever was.

Why Color Coordination Reads as "Expensive" So Fast

Think for a moment about the women you have personally admired for looking effortlessly put-together. I would guess, with fairly high confidence, that most of them were not wearing loud, complicated, five-color combinations. They were almost certainly wearing two colors, or maybe three at most, working together with clear intention.

When colors genuinely agree with each other, your eye reads the entire outfit as one single, cohesive thought. When colors compete instead, your eye gets confused about where it is supposed to look first, and the whole outfit starts to feel chaotic and unresolved, even if every individual piece within it is beautiful on its own terms.

This is one of the fastest, cheapest ways available to make an affordable outfit look genuinely expensive, because it costs you absolutely nothing extra. You already own the colors sitting in your closet right now. You simply have not been combining them with real intention yet — and that is a skill, not a talent, which means it can be learned.

Simple, Forgiving Color Pairing Rules

  • Neutrals plus one accent — build the majority of your outfit from black, white, cream, beige, navy, gray, or brown, then let exactly one color stand out clearly against that neutral base.
  • Tonal dressing — wear different shades within the same color family, head to toe, for a quiet, sophisticated harmony.
  • The 60-30-10 idea, simplified — one main color leads the outfit, one color supports it quietly, and one small accent finishes the whole look (a scarf, a handbag, or earrings).

Common Color Mistakes That Make Outfits Look Cheap or Busy

  • Wearing four or five entirely unrelated colors at once, with no single clear "leader" color.
  • Pairing colors of the exact same brightness and intensity level, which fight each other for attention.
  • Ignoring undertones — pairing a warm-toned piece with a cool-toned piece can create a subtle clash even when the colors seem, on paper, like they should work together.

TOOL: COLOR PAIRING REFERENCE CHART

Use this chart directly against your own wardrobe, right now, while reading this chapter.

BasePairs Beautifully WithAccent Idea
BlackWhite, cream, camel, deep redGold or silver jewelry
WhiteBlack, navy, olive, blushTan or cognac accessories
NavyWhite, cream, mustard, blushGold hardware
Beige / CamelWhite, brown, black, deep greenWarm-toned accessories
GrayBlack, white, burgundy, blushSilver jewelry
BrownCream, olive, mustard, navyGold or bronze tones
Olive GreenWhite, cream, brown, navyNeutral or gold accents
BurgundyBlack, cream, gray, navyGold jewelry

Notice that every single pairing in this chart includes at least one neutral tone. That is entirely deliberate, not incidental. Neutrals are precisely what make color combinations feel calm, resolved, and expensive, instead of loud, competing, and busy.

A note on this chart: these pairings are drawn from general, widely accepted color-styling principles rather than one single verified source — treat this as a reliable starting point, and trust your own eye more and more as you practice applying it.

YOUR ACTIONABLE STEP

Open your wardrobe right now and pick one base color you already own multiple pieces in. Using the chart above, build three complete outfits from that base color and its recommended pairings, using absolutely nothing beyond what you already own.

In the next chapter, we turn to the detail my aunty taught me that quietly finished off everything else in her own outfits — the simple accessory rule.

THE AFFORDABLE ELEGANCE METHOD
CHAPTER FOUR

The Simple Accessory Rule

This is the single piece of advice from my aunty that changed the way I get dressed forever, more than any other single lesson in this entire guide.

She told me, standing in her kitchen at that family gathering, "Repeat one metal tone, and let one piece be the focal point. Everything else should support it quietly." She said it so simply, almost in passing, that I nearly missed how important it actually was.

That single sentence solved something I had been quietly struggling with for years without ever being able to name it properly. I used to wear gold earrings with a silver watch and a rose gold bracelet, all at the same time, and then genuinely wonder why my outfit felt cluttered and unfinished even though every individual piece of jewelry was, on its own, genuinely lovely and well-chosen.

The One Metal Tone, One Focal Point Rule

Here is exactly how this rule works in practice. Choose one metal tone for the day — gold, silver, or rose gold — and keep every single piece of jewelry you wear in that same tone, without exception. This one small discipline alone instantly makes an outfit look far more coordinated and intentional, even if you change absolutely nothing else about what you are wearing.

Then, separately, choose one focal point for the outfit. This is the one piece that is allowed to genuinely stand out and draw attention: a statement necklace, a pair of bold earrings, a structured handbag, or an interesting, eye-catching pair of shoes. Everything else you wear that day should be deliberately quiet enough to let that one chosen piece lead the whole look.

If your earrings are bold and eye-catching, let your necklace stay simple or disappear entirely for the day. If your handbag is your chosen statement piece, let your jewelry stay minimal and understated. Elegant women, in my experience, are rarely wearing five loud things at once. They are usually wearing exactly one.

A Quick Example

Imagine a plain black dress, nothing special on its own. Add gold hoop earrings, a gold watch, and a gold bangle — one single metal tone carried consistently throughout. Then let a structured tan handbag serve as your one chosen focal point for the day, and keep absolutely everything else simple and quiet around it.

That is the entire formula, in full. One tone. One focal point. Nothing competing against anything else for attention.

Example outfit — one metal tone, one focal point rule

YOUR ACTIONABLE STEP: THE "REMOVE ONE THING" EXERCISE

Before you leave the house today, get fully dressed exactly as you normally would, accessories and all. Then stop, look carefully in the mirror, and ask yourself honestly: which one accessory could I remove right now, and the outfit would still feel completely finished?

Take it off.

This single habit — pausing deliberately before you walk out the door and removing exactly one thing — is often, in my own experience, the single fastest way to turn a good outfit into a genuinely elegant one.

In the next chapter, we look closely at the specific mistakes that quietly undo all of this careful work, even on clothes that are already, technically, quite expensive.

THE AFFORDABLE ELEGANCE METHOD
CHAPTER FIVE

Styling Mistakes That Make Even Expensive Clothes Look Cheap

I want to be honest with you about something I have observed repeatedly over the years. I have seen women wearing genuinely expensive clothing still manage to look unfinished and slightly off, and I have seen women wearing five-dollar pieces look completely elegant and put-together. The difference, almost every single time, comes down to a small, specific handful of mistakes.

Here are the ones I see most often in others, and the ones I personally had to consciously unlearn in myself, one at a time.

Wrinkled or Uncared-For Clothing

This, without question, is the fastest possible way to undo an otherwise expensive-looking outfit. A wrinkled blouse reads instantly as careless to the eye, no matter how well the piece fits your body or how genuinely nice the underlying fabric is. A quick pass with an iron, or a few minutes with a handheld steamer, changes the entire impression an outfit makes.

Mismatched Hardware

Gold buttons on a handbag sitting right next to silver jewelry. A rose gold watch paired with gold earrings. This is really the same principle from Chapter 4 showing up again as a visible mistake whenever it gets ignored. Mismatched metals are subtle, but your eye still notices the underlying disagreement, even when you personally cannot name exactly what feels wrong.

Wrong Proportions

Wearing everything oversized at once, or everything tightly fitted at once, without any deliberate contrast between the two, tends to read as unintentional rather than stylish. A relaxed, loose-fitting top usually needs a more fitted bottom to balance it visually, and a fitted, structured top can comfortably carry a looser, more relaxed trouser or skirt.

Over-Accessorizing

We covered this principle already in the previous chapter, but it genuinely deserves repeating here, because it remains one of the most common mistakes I see, over and over. A bold necklace, bold earrings, a heavily patterned bag, and a busy pair of shoes, all worn together at once, will always look more cluttered than expensive, regardless of how much any individual item actually cost.

A Real Example

I once wore a genuinely beautiful satin blouse — one of the nicer, more expensive individual pieces I owned at the time — paired with wrinkled trousers and visibly scuffed shoes. Nobody complimented that outfit, not once, all day. Weeks later, I wore a plain, inexpensive cotton shirt, properly pressed trousers, and clean, well-kept shoes, finished with simple gold jewelry. That second outfit got noticed and complimented multiple times. The blouse, on paper, was the more expensive individual piece. The second outfit, taken as a whole, looked more expensive.

Before and after styling comparison

YOUR ACTIONABLE STEP: THE MISTAKE CHECK

Before leaving home each day, glance over yourself one final time in the mirror and ask, quickly, in sequence:

  • Is anything visibly wrinkled?
  • Are my metals matching consistently?
  • Is there a genuine balance between fitted and relaxed pieces?
  • Have I removed anything extra, per the accessory rule from the last chapter?

This entire check takes well under a minute to run through, and it reliably catches almost everything on this list before you ever walk out the door.

In the next chapter, we shift our focus away from what to avoid and toward how to shop smart whenever you do decide you want to add something genuinely new to your wardrobe.

THE AFFORDABLE ELEGANCE METHOD
CHAPTER SIX

Strategic Shopping on a Limited Budget

I am not against buying new clothes, and I want to be clear about that upfront. I am against buying them randomly and hopefully, the way I used to for years without realizing how much money it was quietly costing me.

I remember standing in a store, years ago now, holding a blouse I genuinely loved on the hanger, with absolutely no clear idea what I already owned that it might realistically pair with. I bought it anyway, swept up in the excitement of the moment. It sat untouched in my closet for well over a year before I finally wore it even once. That one blouse taught me more about shopping wisely than any amount of general advice ever could have, because I learned the hard way, through real wasted money, that simply liking something inside a store means very little if I cannot immediately picture it working with anything I already own at home.

Once you genuinely understand fit, color, accessories, and the common mistakes to avoid, shopping itself becomes a completely different experience. You stop buying individual pieces and hoping, somehow, that they will work with everything else later. You start buying pieces you already know, with real confidence, exactly how you will use.

How to Spot Pieces That Look More Expensive Than Their Price

  • Fabric weight — physically pick up the garment and feel its actual weight. Cheap-feeling fabric is usually thin, stiff, or overly shiny in a synthetic way. Fabric with real substance and a natural drape reads as higher quality, regardless of price.
  • Structure — hold a blazer, top, or dress up to the light, or lay it flat. Does it genuinely hold its own shape, or does it look flimsy and shapeless?
  • Finishing details — check the seams, buttons, and zippers. Loose threads, cheap plastic buttons, or crooked stitching quietly give away a low-quality piece.

One Guiding Principle for Where to Shop

Shop specifically for pieces that work with what you already own, not pieces that only work alongside something else you have not bought yet. Before purchasing anything new, take a moment to picture it paired with at least two specific things already hanging in your wardrobe. If you genuinely cannot picture it clearly, put it back on the rack. This one simple principle, practiced consistently, will save you significantly more money over time than any single sale ever will — and it is the exact principle that blouse eventually taught me, at real financial cost.

Fabric close-up comparison — quality cues

YOUR ACTIONABLE STEP: THE PRE-SHOPPING CHECKLIST

  • Can I picture this working with at least two things I already own?
  • Does the fabric feel genuinely substantial, not thin or flimsy?
  • Are the seams, buttons, and overall finishing clean and well-made?
  • Does this fit properly, right now, on my actual body, as it currently is?

If a potential purchase passes all four of these questions, it is genuinely worth considering. If it fails even one of them, let it go, no matter how much you like it in the moment.

In the final chapter, we finish this method with the small grooming details that quietly complete everything we have already covered together.

THE AFFORDABLE ELEGANCE METHOD
CHAPTER SEVEN

Grooming and Finishing Touches

We have now covered fit, color, accessories, common mistakes to avoid, and smart shopping. But there is one more essential layer that ties everything else together, and it costs the least of everything we have discussed so far: how genuinely put-together you look beyond just your clothes themselves.

The Finishing-Touch Rule

An outfit reads as "expensive" to the eye when it looks fully complete, and completeness, in my experience, usually comes down to one small, deliberate detail: neat hair, clean shoes, or a light, pleasant fragrance. You do not need all three of these to be elaborate or time-consuming. You need at least one of them to be genuinely deliberate and consistent.

My aunty's own finishing touch was always her shoes — simple, low-heeled, and immaculately clean, no matter what else she had on. That one consistent detail did more for her overall look than any accessory ever could.

Low-Cost Grooming Habits That Make a Real Difference

  • Neat hair — even a simple hairstyle looks polished the moment it is tidy and intentional.
  • Clean, presentable nails — bare, clean, and well-kept nails count every bit as much as freshly polished ones.
  • Clean shoes — scuffed or dirty shoes undo an otherwise elegant outfit faster than almost anything else.
  • A fresh face — you do not need a full face of makeup, simply look rested, clean, and cared for.

None of these particular habits require a large budget or a significant time investment. What they genuinely require instead is consistency — turning each one into a habit rather than an occasional afterthought.

Simple grooming essentials flat-lay

YOUR ACTIONABLE STEP: THE 5-MINUTE PRE-LEAVING-HOME ROUTINE

  • Check your hair — smooth down or quickly restyle anything out of place.
  • Wipe down or visually check your shoes for scuffs or dust.
  • Glance at your nails and hands.
  • Apply a light fragrance or moisturizer as your final touch.

This entire routine takes considerably less time than deciding what to actually wear, and in my own experience, it is very often the true difference between simply looking "put together" and looking genuinely polished.

You now have the complete Affordable Elegance Method laid out in full: fit, color, accessories, avoiding the common mistakes that undo good outfits, smart and strategic shopping, and grooming. Every single piece you already own has more potential inside it than you may have previously realized.

Next, we move into your two bonuses — the Outfit Formula Cheat Sheet and the 7-Day Look-Put-Together Challenge — so you can put absolutely everything you have just learned into real, practical action, one day at a time.

THE AFFORDABLE ELEGANCE METHOD
BONUS ONE

The Expensive-Looking Outfit Formula Cheat Sheet

Keep this page nearby. This is your quick-reference guide for building a polished outfit in minutes, using everything you have learned so far.

The Basic Formula

1 fitted piece + 1 relaxed piece + 1 color story + 1 metal tone + 1 focal point

That is the entire formula. Let's break it down into ready-to-use combinations.

Everyday Formulas

Formula 1: The Classic Neutral

  • Fitted top (tucked) + tailored trousers
  • Neutral + one accent color (Chapter 3 chart)
  • One metal tone throughout
  • Focal point: structured bag or one statement earring

Formula 2: The Relaxed Polish

  • Relaxed blouse + fitted trousers or pencil skirt
  • Tonal color dressing (shades of the same color family)
  • Minimal jewelry, one tone
  • Focal point: clean, well-kept shoes

Formula 3: The Dress Formula

  • Well-fitted dress (run the 60-Second Fit-Check first)
  • Belt at the natural waist for shape
  • One metal tone jewelry
  • Focal point: your choice of bag or earrings, not both

Formula 4: The Trouser and Blazer Combo

  • Structured blazer + fitted trousers, or trouser + relaxed blazer
  • Neutral base, one accent piece
  • One metal tone
  • Focal point: the blazer itself — keep jewelry minimal

Formula 5: The Casual Elevated Look

  • Well-fitted jeans + tucked-in blouse or shirt
  • Neutral plus accent color
  • One metal tone
  • Focal point: one statement accessory (bag, belt, or shoes)
Expensive-Looking Outfit Formula Cheat Sheet

QUICK REMINDERS BEFORE YOU WALK OUT

  • Run the fit check if you have not worn the piece in a while.
  • Choose your color story before you choose your accessories.
  • Pick one metal tone and stay with it.
  • Pick one focal point and let everything else stay quiet.
  • Do the mistake check: wrinkles, hardware, proportions, extras.

Pin this page, screenshot it, or keep it open while you get dressed. Over time, you will not need it — these formulas will simply become how you naturally put things together.

THE AFFORDABLE ELEGANCE METHOD
BONUS TWO

The 7-Day Look-Put-Together Challenge

This challenge is designed to help you apply everything from this guide, one small step at a time. You do not need a new wardrobe to complete it. You only need what you already own and about ten to fifteen minutes each day.

Do not skip ahead. Each day builds on the one before it.

Day 1 — The Fit Reset

Task: Run the 60-Second Fit-Check Method on three pieces you wear often. Apply one quick fix.

Reflect: Which piece surprised you most?

Day 2 — The Color Story

Task: Build one outfit using the Color Pairing Reference Chart.

Reflect: Did narrowing your color choices make getting dressed easier or harder?

Day 3 — The Accessory Edit

Task: Apply the one metal tone, one focal point rule. Do the "remove one thing" exercise.

Reflect: What did you remove, and did the outfit feel more finished?

Day 4 — The Mistake Check

Task: Review the Mistake Check list before dressing. Catch and fix at least one mistake.

Reflect: Which mistake do you catch yourself making most often?

Day 5 — The Formula Practice

Task: Choose one formula from your cheat sheet and build today's outfit around it exactly.

Reflect: Did having a formula make getting dressed faster?

Day 6 — The Grooming Habit

Task: Complete the 5-Minute Pre-Leaving-Home Routine. Be especially deliberate about one finishing touch.

Reflect: Did you notice people responding differently to you today?

Day 7 — The Full Method

Task: Bring everything together — fit check, color story, accessory rule, mistake check, grooming routine — start to finish.

Reflect: What is different about how you feel, compared to Day 1?

7-Day Look-Put-Together Challenge tracker

AFTER THE CHALLENGE

You do not need to do all five steps perfectly every single day for the rest of your life. Some mornings you will only have time for the fit check. Other days you will remember the accessory rule but forget the mistake check. That is completely fine.

The goal was never perfection. The goal was to build the habit of asking the right questions before you get dressed, instead of standing in front of your wardrobe feeling lost the way I once did.

You already had everything you needed. Now you know how to use it.

Closing Note From Deborah

I want to leave you with something before you close this guide.

A while back, I shared this same method — quietly, one conversation at a time — with a few women in my own life. Women who, like you, had wardrobes full of clothes and still felt like something was missing. One realized two small tailoring fixes gave her more outfits than five new purchases ever had. Another built an entire week of outfits around colors she'd been ignoring for years. Their wardrobes were different from mine, and from each other's, but the same five details worked for all of us.

That is what convinced me this method wasn't just something that worked for me once. It is something that works because it is simple, repeatable, and true regardless of your size, your budget, or your closet.

You already have what you need. You always did. What you were missing was never more clothes — it was a way of seeing what you already own.

Go back to your wardrobe. Start with one outfit. Run it through the five details. Then do it again tomorrow. That is the whole method. That is all it ever was.

With love,
Deborah

What Women Are Saying

Real experiences from women applying the Affordable Elegance Method.

Juliet Omoregie
Benin City, Nigeria · 2 weeks ago
"I used to just copy outfits I saw on Instagram, buying pieces that never actually worked with my real life. The shopping chapter taught me to slow down and really check the fit, fabric, color, and versatility before buying anything. Now I shop way less, but I make better choices — and honestly, I feel so much happier with my wardrobe."
Belinta White
"This guide helped me stop 'saving' my good clothes for special occasions only. I finally learned how to dress them down and mix them into everyday looks. The first Sunday I tried it, two women at church told me I looked elegant!"
Michelle Adeyemi
Toronto, Canada · 2 weeks ago
"As a busy mom, I needed advice I could actually use in the rush of the morning. I followed the grooming and finishing-touch routine for one week, and even my basic jeans and blouses started looking more put-together. My husband complimented me twice that week — without even knowing I was following a guide!"

What Women Are Saying

Real experiences from women applying the Affordable Elegance Method.

Sade Ajulo
"I always layered on too many accessories because I thought it made an outfit look more expensive. The simple accessory rule taught me to edit down instead. Within a few days, my outfits looked cleaner and more elegant, and getting dressed stopped feeling so confusing."
Comfort Agusi
Manchester, United Kingdom · 10 days ago
"The color-combination section made getting ready for work so much easier. I put together five outfits using clothes I already owned, and everything just looked more coordinated. I feel more confident, and I did not even spend money on a new shopping trip."
Sarah Bello
Atlanta, United States · 1 week ago
"I used to buy new clothes for every event, but something always felt off. The fit checklist showed me that two of my favorite dresses just needed small alterations. Once I restyled them with simpler accessories, my sister actually asked if I had bought new outfits. This guide really opened my eyes."

Your wardrobe does not need to be bigger. It needs to work better for you.

AFFORDABLE ELEGANCE ACTION WORKBOOK1 OF 4
WORKBOOK 1 OF 4

Your 20-Minute Wardrobe Edit

Choose one small section of your wardrobe. The goal is clarity, not a complete closet overhaul.

1
Choose ten pieces
Select items you wear often or want to wear more.
2
Run the five-detail test
Check fit, fabric condition, color harmony, grooming readiness, and restraint.
3
Create three outfits
Write three combinations using only the pieces that passed your check.
AFFORDABLE ELEGANCE ACTION WORKBOOK2 OF 4
WORKBOOK 2 OF 4

Plan Five Polished Outfits

Use this page to remove weekday guesswork and make your existing wardrobe work harder.

1
Choose your base
Pick one neutral trouser, skirt, dress, or pair of jeans.
2
Add coordinated color
Choose one supporting color and one optional accent.
3
Finish with intention
Select one focal accessory and note the grooming detail that completes each look.
AFFORDABLE ELEGANCE ACTION WORKBOOK3 OF 4
WORKBOOK 3 OF 4

Your Smart Shopping Filter

Before buying anything new, pause and answer these questions honestly. A bargain is not a bargain if it remains unworn.

1
Does it fit today?
Check the shoulders, waist, hips, hem, and movement before considering the price.
2
Can I style it three ways?
Name three outfits using clothes and shoes you already own.
3
Will it still look good after care?
Inspect fabric, seams, closures, lining, and the care instructions.
AFFORDABLE ELEGANCE ACTION WORKBOOK4 OF 4
WORKBOOK 4 OF 4

Your 30-Day Elegance Promise

Write one simple commitment you can repeat for the next thirty days. Consistency will change your style faster than random shopping.

1
My daily habit
Choose one: prepare clothes at night, steam before wearing, follow the accessory rule, or complete the grooming check.
2
My weekly reset
Choose one day to plan outfits, care for shoes and bags, and return items to their proper places.
3
My promise to myself
Complete this sentence: I will look polished on my budget by…
How to Look Expensive Without Spending a Lot — The Affordable Elegance Method
How to Look Expensive Without Spending a Lot — cover

A Note From Deborah

I want to start by telling you exactly where this guide came from, because I think you deserve to know before you spend a single page reading it.

I grew up in Africa, where looking neat was treated as a form of self-respect, not vanity. The women around me did not have overflowing wardrobes. They pressed their clothes. They chose their colors with care. They groomed themselves neatly and carried what they wore with quiet confidence. Nobody around me was rich. Everybody still managed to look put-together.

When I moved to the United States, life got busier in a way I was not prepared for. Work, marriage, motherhood, bills, family responsibilities — every dollar suddenly had somewhere important to go, and buying new clothes constantly was no longer something I could justify. I still wanted to look elegant. I just could not afford to solve that want the way I used to.

For a long time, I told myself I would return to "looking good" later, once things settled down. Later kept moving.

My breaking point came on an ordinary Sunday morning. We were getting ready for church, and everyone else was already waiting on me. Clothes covered the bed. I had tried on four different outfits and disliked every single one. Then I found a dress I had bought only a few weeks earlier, the tag still attached, completely forgotten. I sat on the edge of the bed holding that tag, and it hit me that it was not really about the dress. It represented every hopeful, random thing I had bought without any real plan behind it.

My husband gently said, "We have to leave." I looked at the clothes scattered around me and said, more to myself than to him, "I cannot live like this anymore." I was tired of wasting time. Tired of spending money I did not need to spend. Tired of believing the next purchase would somehow solve a problem I did not even understand yet.

That Sunday morning is what finally sent me looking for a real answer, instead of another new outfit. I started asking a different question: instead of "what can I buy," I began asking "what can I create with what I already own." That question sent me researching color pairing, studying how fit actually works on real bodies, testing accessory combinations, learning to spot fabric quality, and eventually having a conversation with my aunty that reorganized everything I had learned into one clear, usable method.

I did not build this guide from theory. I built it from years of trial, error, uncomfortable mornings, wasted purchases, and eventually, real results — first in my own mirror, then in the outfits of the women I quietly shared this method with afterward.

Everything you are about to read has been tested on an actual wardrobe, on an actual budget, under actual time pressure. Nothing here is filler, and nothing here requires you to spend money you do not have.

How to Use This Guide

Read the whole guide once, in order, before trying to apply everything at once. Each chapter builds on the one before it — fit before color, color before accessories, and so on. Once you've read it through, come back to the tools and the cheat sheet as your quick references whenever you're getting dressed.

You do not need to master every detail overnight. You only need to start noticing them. That noticing is where everything else begins.

Contents

  • A Note From Deborah & How to Use This Guide
  • Chapter 1 — The Five Details That Instantly Elevate Any Outfit
  • Chapter 2 — The Perfect Fit Secret
  • Chapter 3 — Elegant Color Combinations Without Buying Anything New
  • Chapter 4 — The Simple Accessory Rule
  • Chapter 5 — Styling Mistakes That Make Even Expensive Clothes Look Cheap
  • Chapter 6 — Strategic Shopping on a Limited Budget
  • Chapter 7 — Grooming and Finishing Touches
  • Bonus 1 — The Expensive-Looking Outfit Formula Cheat Sheet
  • Bonus 2 — The 7-Day Look-Put-Together Challenge
  • Closing Note From Deborah
  • What Women Are Saying
  • Affordable Elegance Action Workbook
THE AFFORDABLE ELEGANCE METHOD
CHAPTER ONE

The Five Details That Instantly Elevate Any Outfit

Let me tell you something I wish someone had told me years ago.

Looking expensive has almost nothing to do with how much you spent. I know that sounds like something people say to make you feel better about a smaller budget. It is not. It is the actual truth I learned the hard way, standing in front of my own overflowing wardrobe, convinced I owned "nothing to wear," even though the closet was, quite literally, full.

I did not need more clothes. I needed a system. And once I found it, I realized it was not complicated at all — it was just something nobody had ever explained to me in one place.

So before we talk about fit, or color, or accessories in detail, I want to give you the whole picture first. There are five details that separate an outfit that looks thrown together from one that looks intentional. I did not invent these five details out of nowhere — they came out of months of paying close attention to the women I considered effortlessly elegant, and noticing what they consistently got right that I was consistently getting wrong.

Once you can see these five details, you cannot unsee them. You will start noticing them on other women without even trying. You will start noticing when they are missing from your own outfit before you even leave the house, which is exactly the instinct we are building toward.

Here they are, one at a time.

1. Fit

Not size. Fit. A blouse can be your correct size on the tag and still fit you badly — pulling at the buttons, drowning your shoulders, bunching awkwardly at the waist. This is the detail I underestimated the longest, because I assumed if the size was right, the fit was automatically right too. It is not. We will go deep into fit in Chapter 2, because I believe it is the single most underrated detail in this entire method. For now, just hold onto this: nothing ages an outfit faster than clothes that do not sit right on your particular body.

2. Color harmony

This is not about memorizing color theory or owning a color wheel app. It is about choosing colors that agree with each other instead of quietly competing for attention. A polished woman is rarely wearing five different colors at once. She is usually wearing two, maybe three, working together on purpose, even if she never consciously thought about why it worked. We will build this skill properly in Chapter 3.

3. Condition and care

Wrinkled fabric. Faded color. Bobbled knitwear. Scuffed shoes. This is the detail people notice without ever realizing they noticed it — it registers as a feeling, not a specific observation. A five-dollar top that is clean, pressed, and cared for will always look more expensive to the eye than a fifty-dollar top that looks tired and neglected.

4. Grooming

Your outfit is not the only thing people see, even though it is easy to focus all your attention there. Neat hair, clean nails, a fresh, rested-looking face — these finish the picture your clothes started. You do not need an elaborate routine here. You need a consistent one, which we'll build in Chapter 7.

5. Restraint

This is the detail that surprised me the most, because it went against everything I assumed about "dressing up." Elegant women are not wearing everything they own at once. One statement piece. One focal point. Everything else supports it quietly, almost invisibly. More is rarely more. More is usually just more — more noise, more clutter, less clarity about what you're actually trying to say with the outfit.

That is it. Fit. Color. Condition. Grooming. Restraint. Five things. Not fifty, not some overwhelming checklist requiring a whole closet overhaul. Five things you can start applying today, with clothes you already own.

The 5 Details icon chart

YOUR QUICK WIN — DO THIS BEFORE YOU READ ANY FURTHER

I do not want you to just read this chapter and move on, filing it away as "interesting" and forgetting it by tomorrow. I want you to feel a real difference today, in the next ten minutes, before you keep reading a single page further.

Here is what I want you to do right now.

Go to your wardrobe and pull out one outfit you already planned to wear this week — nothing special, nothing new, just something ordinary and already in rotation. Lay it out, or put it on if you can.

Now run it through the five details, one at a time, slowly:

  • Fit — Is anything pulling, gaping, or hanging in a way that does not flatter you? If yes, is there a quick fix available right now — tucking it in, rolling the sleeves, belting the waist?
  • Color — Are you wearing more than three colors right now? If so, could you remove one item to simplify the palette?
  • Condition — Is everything clean and pressed? If something is wrinkled, is there time to iron or steam it before you wear it today?
  • Grooming — Does your hair, skin, or nails need five minutes of attention to match the effort of the outfit?
  • Restraint — Are you wearing more than one "statement" piece at once? If so, choose your favorite one and set the rest aside for today.

Make one change. Just one. Fix the fit, remove one color, or take off one accessory. Do not try to fix all five at once — that is not the point of this exercise.

Then look in the mirror.

That small shift you just felt — that is not luck, and it is not about money. That is the Affordable Elegance Method already working, even before we go a single page deeper into the details. I promise you, it only gets clearer and more automatic from here.

YOUR ACTIONABLE STEP: THE 5-DETAIL AUDIT

I want you to keep this checklist somewhere you will actually see it every day — the inside of your wardrobe door, a note on your phone lock screen, a sticky note on your mirror, wherever genuinely works for your life. Before you leave home each day, run through it quickly:

  • Fit — Does everything sit correctly on my body right now, today?
  • Color — Am I wearing colors that work together, not against each other?
  • Condition — Is everything clean, pressed, and visibly cared for?
  • Grooming — Do I look as put-together as my outfit is trying to look?
  • Restraint — Have I let one piece lead the outfit, instead of everything competing for attention at once?

This is not about achieving perfection every single morning of your life. Some days you will only have time to fix one thing on this list, and that is still real progress, not failure. Over time, this audit will stop being something you consciously think through and start being simply how you get dressed, without even reaching for the checklist anymore.

In the next chapter, we slow down on that very first detail — fit — because it deserves far more than a quick summary. I am going to walk you through exactly how to check it, every time, without guessing.

THE AFFORDABLE ELEGANCE METHOD
CHAPTER TWO

The Perfect Fit Secret

I mentioned in the last chapter that fit matters more than almost anything else in your wardrobe. Now I want to slow all the way down and show you exactly why, because I genuinely believe this is the most underrated detail in the entire method — the one that quietly does more work than color, accessories, or anything else we will cover.

Here is something I did not understand for years, and it took me embarrassingly long to figure out: two women can wear the exact same blouse, in the exact same size, and one will look effortlessly polished while the other looks unfinished and slightly uncomfortable. The difference is almost never the blouse itself. It is the fit.

I used to think fit and size were the same thing. They are not. Fit is not the number printed on the tag. It is how the fabric actually sits on your particular body, today, right now, in this season of your life. A "medium" that fit you perfectly two years ago might pull differently across your shoulders now, or hang differently at your hips. A dress that looked flawless on the mannequin in the store might sit completely differently once it is on your real, moving, breathing body. None of this is a flaw in you. It is simply a mismatch between the garment and your body in this specific moment, and mismatches like this are almost always fixable — often without spending a single extra dollar on new clothes.

Why Fit Matters More Than Fabric or Brand

When something fits well, your eye reads it as intentional, as if it was made specifically for you, even if it came from the clearance rack. When something fits badly, your eye reads it as an accident — something grabbed in a hurry, something that does not quite belong — even if the fabric is beautiful and the color is exactly right.

Think about it this way for a moment. A well-fitted, plain white cotton shirt will almost always look more expensive to the eye than a designer blouse that pulls awkwardly at the buttons or hangs shapelessly off the shoulders. Fit is the very first thing people notice about an outfit, even if they could never quite tell you why an outfit looks "off" or "not quite right." Most people cannot name what bad fit looks like. They can only feel that something is wrong.

This is exactly why my aunty's advice stuck with me so deeply, and why I still think about it years later. She never once mentioned a brand name, a price tag, or a trend. She talked about the line of a shoulder seam. She talked about where a waistband should sit. She was talking about fit the entire time — she simply never used that specific word, because to her, it was not a technical concept. It was just common sense, the kind of thing her own mother had taught her.

What Good Fit Actually Looks Like

You do not need a sewing background, a tailoring certificate, or years of experience to spot bad fit. You just need to know precisely where to look, and once you know, you will start seeing it everywhere — in your own mirror and in other people's outfits alike.

  • At the shoulders — the seam of a top should sit right at the edge of your shoulder bone, not halfway down your upper arm, and not pulling up uncomfortably toward your neck.
  • At the waist — if a top, dress, or jacket has any defined waist shaping, it should sit at your natural waistline, not riding up toward your ribs or drooping down toward your hips.
  • At the hem — sleeves and trouser hems should end at a deliberate, chosen point on your body, not an accidental one.
  • Across the chest and back — this is the one most women miss. Watch closely for pulling, gaping between buttons, or fabric that strains uncomfortably when you move naturally, reach, or sit down.

Cheap, Fast Fixes for Common Fit Problems

  • Tucking — a shirt that runs slightly too long or boxy often transforms completely the moment you tuck it in.
  • Belting — adding a belt at your natural waist instantly creates shape and structure.
  • Rolling — sleeves that run a little too long can be rolled once or twice to create a cleaner line.
  • Tailoring — for pieces you genuinely wear often, a small tailoring investment is almost always cheaper long-term than replacing the item entirely.
Front, side, back fit-check diagram

TOOL: THE 60-SECOND FIT-CHECK METHOD

  1. Step 1 — Front check (15 sec): Shoulders sitting correctly? Any pulling across chest or stomach?
  2. Step 2 — Side check (15 sec): Hemline at a flattering point? Waist defined, not hidden?
  3. Step 3 — Back check (15 sec): Any pulling or bunching you can't see from the front?
  4. Step 4 — Movement check (15 sec): Raise your arms, sit down. Does everything still sit correctly?

If you discover a problem during any of these four steps, go straight back to the fixes above. Tuck it. Belt it. Roll it. Or simply make a mental note that this particular piece is a strong candidate for a visit to a tailor.

YOUR ACTIONABLE STEP

Choose three items you wear often — one top, one pair of trousers, and one dress or skirt. Run each one through the full 60-Second Fit-Check today, without skipping any of the four steps.

For anything that fails the check, apply one fix immediately: tuck it, belt it, or roll it. For anything that keeps failing no matter what small fix you try, set it aside honestly as a tailoring candidate.

In the next chapter, we build directly on this foundation. Once your clothes fit you properly, color becomes the very next detail that instantly signals elegance to anyone looking at you.

THE AFFORDABLE ELEGANCE METHOD
CHAPTER THREE

Elegant Color Combinations Without Buying Anything New

Once fit is right, color is the very next thing people notice about an outfit — often before they even consciously register what specific pieces you are wearing. The eye processes color before it processes detail, which is exactly why getting this one thing right carries so much visual weight.

I used to think color was the hardest, most mysterious part of getting dressed well. I would stand in front of my wardrobe, completely convinced that nothing "matched," even though I owned plenty of genuinely beautiful individual pieces. What I did not understand yet, and what took me an embarrassingly long time to learn, was that matching was never actually the goal I should have been chasing. Harmony was the real goal. And harmony, it turns out, is far more forgiving and far more achievable than strict matching ever was.

Why Color Coordination Reads as "Expensive" So Fast

Think for a moment about the women you have personally admired for looking effortlessly put-together. I would guess, with fairly high confidence, that most of them were not wearing loud, complicated, five-color combinations. They were almost certainly wearing two colors, or maybe three at most, working together with clear intention.

When colors genuinely agree with each other, your eye reads the entire outfit as one single, cohesive thought. When colors compete instead, your eye gets confused about where it is supposed to look first, and the whole outfit starts to feel chaotic and unresolved, even if every individual piece within it is beautiful on its own terms.

This is one of the fastest, cheapest ways available to make an affordable outfit look genuinely expensive, because it costs you absolutely nothing extra. You already own the colors sitting in your closet right now. You simply have not been combining them with real intention yet — and that is a skill, not a talent, which means it can be learned.

Simple, Forgiving Color Pairing Rules

  • Neutrals plus one accent — build the majority of your outfit from black, white, cream, beige, navy, gray, or brown, then let exactly one color stand out clearly against that neutral base.
  • Tonal dressing — wear different shades within the same color family, head to toe, for a quiet, sophisticated harmony.
  • The 60-30-10 idea, simplified — one main color leads the outfit, one color supports it quietly, and one small accent finishes the whole look (a scarf, a handbag, or earrings).

Common Color Mistakes That Make Outfits Look Cheap or Busy

  • Wearing four or five entirely unrelated colors at once, with no single clear "leader" color.
  • Pairing colors of the exact same brightness and intensity level, which fight each other for attention.
  • Ignoring undertones — pairing a warm-toned piece with a cool-toned piece can create a subtle clash even when the colors seem, on paper, like they should work together.

TOOL: COLOR PAIRING REFERENCE CHART

Use this chart directly against your own wardrobe, right now, while reading this chapter.

Color Pairing Reference Chart

YOUR ACTIONABLE STEP

Open your wardrobe right now and pick one base color you already own multiple pieces in. Using the chart above, build three complete outfits from that base color and its recommended pairings, using absolutely nothing beyond what you already own.

In the next chapter, we turn to the detail my aunty taught me that quietly finished off everything else in her own outfits — the simple accessory rule.

THE AFFORDABLE ELEGANCE METHOD
CHAPTER FOUR

The Simple Accessory Rule

This is the single piece of advice from my aunty that changed the way I get dressed forever, more than any other single lesson in this entire guide.

She told me, standing in her kitchen at that family gathering, "Repeat one metal tone, and let one piece be the focal point. Everything else should support it quietly." She said it so simply, almost in passing, that I nearly missed how important it actually was.

That single sentence solved something I had been quietly struggling with for years without ever being able to name it properly. I used to wear gold earrings with a silver watch and a rose gold bracelet, all at the same time, and then genuinely wonder why my outfit felt cluttered and unfinished even though every individual piece of jewelry was, on its own, genuinely lovely and well-chosen.

The One Metal Tone, One Focal Point Rule

Here is exactly how this rule works in practice. Choose one metal tone for the day — gold, silver, or rose gold — and keep every single piece of jewelry you wear in that same tone, without exception. This one small discipline alone instantly makes an outfit look far more coordinated and intentional, even if you change absolutely nothing else about what you are wearing.

Then, separately, choose one focal point for the outfit. This is the one piece that is allowed to genuinely stand out and draw attention: a statement necklace, a pair of bold earrings, a structured handbag, or an interesting, eye-catching pair of shoes. Everything else you wear that day should be deliberately quiet enough to let that one chosen piece lead the whole look.

If your earrings are bold and eye-catching, let your necklace stay simple or disappear entirely for the day. If your handbag is your chosen statement piece, let your jewelry stay minimal and understated. Elegant women, in my experience, are rarely wearing five loud things at once. They are usually wearing exactly one.

A Quick Example

Imagine a plain black dress, nothing special on its own. Add gold hoop earrings, a gold watch, and a gold bangle — one single metal tone carried consistently throughout. Then let a structured tan handbag serve as your one chosen focal point for the day, and keep absolutely everything else simple and quiet around it.

That is the entire formula, in full. One tone. One focal point. Nothing competing against anything else for attention.

Example outfit — one metal tone, one focal point rule Statement Accessories — one handbag, three styles

YOUR ACTIONABLE STEP: THE "REMOVE ONE THING" EXERCISE

Before you leave the house today, get fully dressed exactly as you normally would, accessories and all. Then stop, look carefully in the mirror, and ask yourself honestly: which one accessory could I remove right now, and the outfit would still feel completely finished?

Take it off.

This single habit — pausing deliberately before you walk out the door and removing exactly one thing — is often, in my own experience, the single fastest way to turn a good outfit into a genuinely elegant one.

In the next chapter, we look closely at the specific mistakes that quietly undo all of this careful work, even on clothes that are already, technically, quite expensive.

THE AFFORDABLE ELEGANCE METHOD
CHAPTER FIVE

Styling Mistakes That Make Even Expensive Clothes Look Cheap

I want to be honest with you about something I have observed repeatedly over the years. I have seen women wearing genuinely expensive clothing still manage to look unfinished and slightly off, and I have seen women wearing five-dollar pieces look completely elegant and put-together. The difference, almost every single time, comes down to a small, specific handful of mistakes.

Here are the ones I see most often in others, and the ones I personally had to consciously unlearn in myself, one at a time.

Wrinkled or Uncared-For Clothing

This, without question, is the fastest possible way to undo an otherwise expensive-looking outfit. A wrinkled blouse reads instantly as careless to the eye, no matter how well the piece fits your body or how genuinely nice the underlying fabric is. A quick pass with an iron, or a few minutes with a handheld steamer, changes the entire impression an outfit makes.

Mismatched Hardware

Gold buttons on a handbag sitting right next to silver jewelry. A rose gold watch paired with gold earrings. This is really the same principle from Chapter 4 showing up again as a visible mistake whenever it gets ignored. Mismatched metals are subtle, but your eye still notices the underlying disagreement, even when you personally cannot name exactly what feels wrong.

Wrong Proportions

Wearing everything oversized at once, or everything tightly fitted at once, without any deliberate contrast between the two, tends to read as unintentional rather than stylish. A relaxed, loose-fitting top usually needs a more fitted bottom to balance it visually, and a fitted, structured top can comfortably carry a looser, more relaxed trouser or skirt.

Over-Accessorizing

We covered this principle already in the previous chapter, but it genuinely deserves repeating here, because it remains one of the most common mistakes I see, over and over. A bold necklace, bold earrings, a heavily patterned bag, and a busy pair of shoes, all worn together at once, will always look more cluttered than expensive, regardless of how much any individual item actually cost.

A Real Example

I once wore a genuinely beautiful satin blouse — one of the nicer, more expensive individual pieces I owned at the time — paired with wrinkled trousers and visibly scuffed shoes. Nobody complimented that outfit, not once, all day. Weeks later, I wore a plain, inexpensive cotton shirt, properly pressed trousers, and clean, well-kept shoes, finished with simple gold jewelry. That second outfit got noticed and complimented multiple times. The blouse, on paper, was the more expensive individual piece. The second outfit, taken as a whole, looked more expensive.

Before and after styling comparison

YOUR ACTIONABLE STEP: THE MISTAKE CHECK

Before leaving home each day, glance over yourself one final time in the mirror and ask, quickly, in sequence:

  • Is anything visibly wrinkled?
  • Are my metals matching consistently?
  • Is there a genuine balance between fitted and relaxed pieces?
  • Have I removed anything extra, per the accessory rule from the last chapter?

This entire check takes well under a minute to run through, and it reliably catches almost everything on this list before you ever walk out the door.

In the next chapter, we shift our focus away from what to avoid and toward how to shop smart whenever you do decide you want to add something genuinely new to your wardrobe.

THE AFFORDABLE ELEGANCE METHOD
CHAPTER SIX

Strategic Shopping on a Limited Budget

I am not against buying new clothes, and I want to be clear about that upfront. I am against buying them randomly and hopefully, the way I used to for years without realizing how much money it was quietly costing me.

I remember standing in a store, years ago now, holding a blouse I genuinely loved on the hanger, with absolutely no clear idea what I already owned that it might realistically pair with. I bought it anyway, swept up in the excitement of the moment. It sat untouched in my closet for well over a year before I finally wore it even once. That one blouse taught me more about shopping wisely than any amount of general advice ever could have, because I learned the hard way, through real wasted money, that simply liking something inside a store means very little if I cannot immediately picture it working with anything I already own at home.

Once you genuinely understand fit, color, accessories, and the common mistakes to avoid, shopping itself becomes a completely different experience. You stop buying individual pieces and hoping, somehow, that they will work with everything else later. You start buying pieces you already know, with real confidence, exactly how you will use.

How to Spot Pieces That Look More Expensive Than Their Price

  • Fabric weight — physically pick up the garment and feel its actual weight. Cheap-feeling fabric is usually thin, stiff, or overly shiny in a synthetic way. Fabric with real substance and a natural drape reads as higher quality, regardless of price.
  • Structure — hold a blazer, top, or dress up to the light, or lay it flat. Does it genuinely hold its own shape, or does it look flimsy and shapeless?
  • Finishing details — check the seams, buttons, and zippers. Loose threads, cheap plastic buttons, or crooked stitching quietly give away a low-quality piece.

One Guiding Principle for Where to Shop

Shop specifically for pieces that work with what you already own, not pieces that only work alongside something else you have not bought yet. Before purchasing anything new, take a moment to picture it paired with at least two specific things already hanging in your wardrobe. If you genuinely cannot picture it clearly, put it back on the rack. This one simple principle, practiced consistently, will save you significantly more money over time than any single sale ever will — and it is the exact principle that blouse eventually taught me, at real financial cost.

Fabric close-up comparison — quality cues

YOUR ACTIONABLE STEP: THE PRE-SHOPPING CHECKLIST

  • Can I picture this working with at least two things I already own?
  • Does the fabric feel genuinely substantial, not thin or flimsy?
  • Are the seams, buttons, and overall finishing clean and well-made?
  • Does this fit properly, right now, on my actual body, as it currently is?

If a potential purchase passes all four of these questions, it is genuinely worth considering. If it fails even one of them, let it go, no matter how much you like it in the moment.

In the final chapter, we finish this method with the small grooming details that quietly complete everything we have already covered together.

THE AFFORDABLE ELEGANCE METHOD
CHAPTER SEVEN

Grooming and Finishing Touches

We have now covered fit, color, accessories, common mistakes to avoid, and smart shopping. But there is one more essential layer that ties everything else together, and it costs the least of everything we have discussed so far: how genuinely put-together you look beyond just your clothes themselves.

The Finishing-Touch Rule

An outfit reads as "expensive" to the eye when it looks fully complete, and completeness, in my experience, usually comes down to one small, deliberate detail: neat hair, clean shoes, or a light, pleasant fragrance. You do not need all three of these to be elaborate or time-consuming. You need at least one of them to be genuinely deliberate and consistent.

My aunty's own finishing touch was always her shoes — simple, low-heeled, and immaculately clean, no matter what else she had on. That one consistent detail did more for her overall look than any accessory ever could.

Low-Cost Grooming Habits That Make a Real Difference

  • Neat hair — even a simple hairstyle looks polished the moment it is tidy and intentional.
  • Clean, presentable nails — bare, clean, and well-kept nails count every bit as much as freshly polished ones.
  • Clean shoes — scuffed or dirty shoes undo an otherwise elegant outfit faster than almost anything else.
  • A fresh face — you do not need a full face of makeup, simply look rested, clean, and cared for.

None of these particular habits require a large budget or a significant time investment. What they genuinely require instead is consistency — turning each one into a habit rather than an occasional afterthought.

The Finishing Touch — simple details, big difference

YOUR ACTIONABLE STEP: THE 5-MINUTE PRE-LEAVING-HOME ROUTINE

  • Check your hair — smooth down or quickly restyle anything out of place.
  • Wipe down or visually check your shoes for scuffs or dust.
  • Glance at your nails and hands.
  • Apply a light fragrance or moisturizer as your final touch.

This entire routine takes considerably less time than deciding what to actually wear, and in my own experience, it is very often the true difference between simply looking "put together" and looking genuinely polished.

You now have the complete Affordable Elegance Method laid out in full: fit, color, accessories, avoiding the common mistakes that undo good outfits, smart and strategic shopping, and grooming. Every single piece you already own has more potential inside it than you may have previously realized.

Next, we move into your two bonuses — the Outfit Formula Cheat Sheet and the 7-Day Look-Put-Together Challenge — so you can put absolutely everything you have just learned into real, practical action, one day at a time.

THE AFFORDABLE ELEGANCE METHOD
BONUS ONE

The Expensive-Looking Outfit Formula Cheat Sheet

Keep this page nearby. This is your quick-reference guide for building a polished outfit in minutes, using everything you have learned so far.

The Basic Formula

1 fitted piece + 1 relaxed piece + 1 color story + 1 metal tone + 1 focal point

That is the entire formula. Let's break it down into ready-to-use combinations.

Everyday Formulas

Formula 1: The Classic Neutral

  • Fitted top (tucked) + tailored trousers
  • Neutral + one accent color (Chapter 3 chart)
  • One metal tone throughout
  • Focal point: structured bag or one statement earring

Formula 2: The Relaxed Polish

  • Relaxed blouse + fitted trousers or pencil skirt
  • Tonal color dressing (shades of the same color family)
  • Minimal jewelry, one tone
  • Focal point: clean, well-kept shoes

Formula 3: The Dress Formula

  • Well-fitted dress (run the 60-Second Fit-Check first)
  • Belt at the natural waist for shape
  • One metal tone jewelry
  • Focal point: your choice of bag or earrings, not both

Formula 4: The Trouser and Blazer Combo

  • Structured blazer + fitted trousers, or trouser + relaxed blazer
  • Neutral base, one accent piece
  • One metal tone
  • Focal point: the blazer itself — keep jewelry minimal

Formula 5: The Casual Elevated Look

  • Well-fitted jeans + tucked-in blouse or shirt
  • Neutral plus accent color
  • One metal tone
  • Focal point: one statement accessory (bag, belt, or shoes)
Formula 5: The Casual Elevated Look — cheat sheet Bonus 1 Cheat Sheet Card and Bonus 2 7-Day Style Confidence Tracker

QUICK REMINDERS BEFORE YOU WALK OUT

  • Run the fit check if you have not worn the piece in a while.
  • Choose your color story before you choose your accessories.
  • Pick one metal tone and stay with it.
  • Pick one focal point and let everything else stay quiet.
  • Do the mistake check: wrinkles, hardware, proportions, extras.

Pin this page, screenshot it, or keep it open while you get dressed. Over time, you will not need it — these formulas will simply become how you naturally put things together.

THE AFFORDABLE ELEGANCE METHOD
BONUS TWO

The 7-Day Look-Put-Together Challenge

This challenge is designed to help you apply everything from this guide, one small step at a time. You do not need a new wardrobe to complete it. You only need what you already own and about ten to fifteen minutes each day.

Do not skip ahead. Each day builds on the one before it.

Day 1 — The Fit Reset

Task: Run the 60-Second Fit-Check Method on three pieces you wear often. Apply one quick fix.

Reflect: Which piece surprised you most?

Day 2 — The Color Story

Task: Build one outfit using the Color Pairing Reference Chart.

Reflect: Did narrowing your color choices make getting dressed easier or harder?

Day 3 — The Accessory Edit

Task: Apply the one metal tone, one focal point rule. Do the "remove one thing" exercise.

Reflect: What did you remove, and did the outfit feel more finished?

Day 4 — The Mistake Check

Task: Review the Mistake Check list before dressing. Catch and fix at least one mistake.

Reflect: Which mistake do you catch yourself making most often?

Day 5 — The Formula Practice

Task: Choose one formula from your cheat sheet and build today's outfit around it exactly.

Reflect: Did having a formula make getting dressed faster?

Day 6 — The Grooming Habit

Task: Complete the 5-Minute Pre-Leaving-Home Routine. Be especially deliberate about one finishing touch.

Reflect: Did you notice people responding differently to you today?

Day 7 — The Full Method

Task: Bring everything together — fit check, color story, accessory rule, mistake check, grooming routine — start to finish.

Reflect: What is different about how you feel, compared to Day 1?

7-Day Style Confidence Tracker

AFTER THE CHALLENGE

You do not need to do all five steps perfectly every single day for the rest of your life. Some mornings you will only have time for the fit check. Other days you will remember the accessory rule but forget the mistake check. That is completely fine.

The goal was never perfection. The goal was to build the habit of asking the right questions before you get dressed, instead of standing in front of your wardrobe feeling lost the way I once did.

You already had everything you needed. Now you know how to use it.

Closing Note From Deborah

I want to leave you with something before you close this guide.

A while back, I shared this same method — quietly, one conversation at a time — with a few women in my own life. Women who, like you, had wardrobes full of clothes and still felt like something was missing. One realized two small tailoring fixes gave her more outfits than five new purchases ever had. Another built an entire week of outfits around colors she'd been ignoring for years. Their wardrobes were different from mine, and from each other's, but the same five details worked for all of us.

That is what convinced me this method wasn't just something that worked for me once. It is something that works because it is simple, repeatable, and true regardless of your size, your budget, or your closet.

You already have what you need. You always did. What you were missing was never more clothes — it was a way of seeing what you already own.

Go back to your wardrobe. Start with one outfit. Run it through the five details. Then do it again tomorrow. That is the whole method. That is all it ever was.

With love,
Deborah

What Women Are Saying

Real experiences from women applying the Affordable Elegance Method.

Juliet Omoregie
Benin City, Nigeria · 2 weeks ago
"I used to just copy outfits I saw on Instagram, buying pieces that never actually worked with my real life. The shopping chapter taught me to slow down and really check the fit, fabric, color, and versatility before buying anything. Now I shop way less, but I make better choices — and honestly, I feel so much happier with my wardrobe."
Belinta White
"This guide helped me stop 'saving' my good clothes for special occasions only. I finally learned how to dress them down and mix them into everyday looks. The first Sunday I tried it, two women at church told me I looked elegant!"
Michelle Adeyemi
Toronto, Canada · 2 weeks ago
"As a busy mom, I needed advice I could actually use in the rush of the morning. I followed the grooming and finishing-touch routine for one week, and even my basic jeans and blouses started looking more put-together. My husband complimented me twice that week — without even knowing I was following a guide!"

What Women Are Saying

Real experiences from women applying the Affordable Elegance Method.

Sade Ajulo
"I always layered on too many accessories because I thought it made an outfit look more expensive. The simple accessory rule taught me to edit down instead. Within a few days, my outfits looked cleaner and more elegant, and getting dressed stopped feeling so confusing."
Comfort Agusi
Manchester, United Kingdom · 10 days ago
"The color-combination section made getting ready for work so much easier. I put together five outfits using clothes I already owned, and everything just looked more coordinated. I feel more confident, and I did not even spend money on a new shopping trip."
Sarah Bello
Atlanta, United States · 1 week ago
"I used to buy new clothes for every event, but something always felt off. The fit checklist showed me that two of my favorite dresses just needed small alterations. Once I restyled them with simpler accessories, my sister actually asked if I had bought new outfits. This guide really opened my eyes."

Your wardrobe does not need to be bigger. It needs to work better for you.

AFFORDABLE ELEGANCE ACTION WORKBOOK1 OF 4
WORKBOOK 1 OF 4

Your 20-Minute Wardrobe Edit

Choose one small section of your wardrobe. The goal is clarity, not a complete closet overhaul.

1
Choose ten pieces
Select items you wear often or want to wear more.
2
Run the five-detail test
Check fit, fabric condition, color harmony, grooming readiness, and restraint.
3
Create three outfits
Write three combinations using only the pieces that passed your check.
AFFORDABLE ELEGANCE ACTION WORKBOOK2 OF 4
WORKBOOK 2 OF 4

Plan Five Polished Outfits

Use this page to remove weekday guesswork and make your existing wardrobe work harder.

1
Choose your base
Pick one neutral trouser, skirt, dress, or pair of jeans.
2
Add coordinated color
Choose one supporting color and one optional accent.
3
Finish with intention
Select one focal accessory and note the grooming detail that completes each look.
AFFORDABLE ELEGANCE ACTION WORKBOOK3 OF 4
WORKBOOK 3 OF 4

Your Smart Shopping Filter

Before buying anything new, pause and answer these questions honestly. A bargain is not a bargain if it remains unworn.

1
Does it fit today?
Check the shoulders, waist, hips, hem, and movement before considering the price.
2
Can I style it three ways?
Name three outfits using clothes and shoes you already own.
3
Will it still look good after care?
Inspect fabric, seams, closures, lining, and the care instructions.
AFFORDABLE ELEGANCE ACTION WORKBOOK4 OF 4
WORKBOOK 4 OF 4

Your 30-Day Elegance Promise

Write one simple commitment you can repeat for the next thirty days. Consistency will change your style faster than random shopping.

1
My daily habit
Choose one: prepare clothes at night, steam before wearing, follow the accessory rule, or complete the grooming check.
2
My weekly reset
Choose one day to plan outfits, care for shoes and bags, and return items to their proper places.
3
My promise to myself
Complete this sentence: I will look polished on my budget by…
How to Look Expensive Without Spending a Lot — The Affordable Elegance Method
How to Look Expensive Without Spending a Lot — cover

A Note From Deborah

I want to start by telling you exactly where this guide came from, because I think you deserve to know before you spend a single page reading it.

I grew up in Africa, where looking neat was treated as a form of self-respect, not vanity. The women around me did not have overflowing wardrobes. They pressed their clothes. They chose their colors with care. They groomed themselves neatly and carried what they wore with quiet confidence. Nobody around me was rich. Everybody still managed to look put-together.

When I moved to the United States, life got busier in a way I was not prepared for. Work, marriage, motherhood, bills, family responsibilities — every dollar suddenly had somewhere important to go, and buying new clothes constantly was no longer something I could justify. I still wanted to look elegant. I just could not afford to solve that want the way I used to.

For a long time, I told myself I would return to "looking good" later, once things settled down. Later kept moving.

My breaking point came on an ordinary Sunday morning. We were getting ready for church, and everyone else was already waiting on me. Clothes covered the bed. I had tried on four different outfits and disliked every single one. Then I found a dress I had bought only a few weeks earlier, the tag still attached, completely forgotten. I sat on the edge of the bed holding that tag, and it hit me that it was not really about the dress. It represented every hopeful, random thing I had bought without any real plan behind it.

My husband gently said, "We have to leave." I looked at the clothes scattered around me and said, more to myself than to him, "I cannot live like this anymore." I was tired of wasting time. Tired of spending money I did not need to spend. Tired of believing the next purchase would somehow solve a problem I did not even understand yet.

That Sunday morning is what finally sent me looking for a real answer, instead of another new outfit. I started asking a different question: instead of "what can I buy," I began asking "what can I create with what I already own." That question sent me researching color pairing, studying how fit actually works on real bodies, testing accessory combinations, learning to spot fabric quality, and eventually having a conversation with my aunty that reorganized everything I had learned into one clear, usable method.

I did not build this guide from theory. I built it from years of trial, error, uncomfortable mornings, wasted purchases, and eventually, real results — first in my own mirror, then in the outfits of the women I quietly shared this method with afterward.

Everything you are about to read has been tested on an actual wardrobe, on an actual budget, under actual time pressure. Nothing here is filler, and nothing here requires you to spend money you do not have.

How to Use This Guide

Read the whole guide once, in order, before trying to apply everything at once. Each chapter builds on the one before it — fit before color, color before accessories, and so on. Once you've read it through, come back to the tools and the cheat sheet as your quick references whenever you're getting dressed.

You do not need to master every detail overnight. You only need to start noticing them. That noticing is where everything else begins.

Contents

  • A Note From Deborah & How to Use This Guide
  • Chapter 1 — The Five Details That Instantly Elevate Any Outfit
  • Chapter 2 — The Perfect Fit Secret
  • Chapter 3 — Elegant Color Combinations Without Buying Anything New
  • Chapter 4 — The Simple Accessory Rule
  • Chapter 5 — Styling Mistakes That Make Even Expensive Clothes Look Cheap
  • Chapter 6 — Strategic Shopping on a Limited Budget
  • Chapter 7 — Grooming and Finishing Touches
  • Bonus 1 — The Expensive-Looking Outfit Formula Cheat Sheet
  • Bonus 2 — The 7-Day Look-Put-Together Challenge
  • Closing Note From Deborah
  • What Women Are Saying
  • Affordable Elegance Action Workbook
THE AFFORDABLE ELEGANCE METHOD
CHAPTER ONE

The Five Details That Instantly Elevate Any Outfit

Let me tell you something I wish someone had told me years ago.

Looking expensive has almost nothing to do with how much you spent. I know that sounds like something people say to make you feel better about a smaller budget. It is not. It is the actual truth I learned the hard way, standing in front of my own overflowing wardrobe, convinced I owned "nothing to wear," even though the closet was, quite literally, full.

I did not need more clothes. I needed a system. And once I found it, I realized it was not complicated at all — it was just something nobody had ever explained to me in one place.

So before we talk about fit, or color, or accessories in detail, I want to give you the whole picture first. There are five details that separate an outfit that looks thrown together from one that looks intentional. I did not invent these five details out of nowhere — they came out of months of paying close attention to the women I considered effortlessly elegant, and noticing what they consistently got right that I was consistently getting wrong.

Once you can see these five details, you cannot unsee them. You will start noticing them on other women without even trying. You will start noticing when they are missing from your own outfit before you even leave the house, which is exactly the instinct we are building toward.

Here they are, one at a time.

1. Fit

Not size. Fit. A blouse can be your correct size on the tag and still fit you badly — pulling at the buttons, drowning your shoulders, bunching awkwardly at the waist. This is the detail I underestimated the longest, because I assumed if the size was right, the fit was automatically right too. It is not. We will go deep into fit in Chapter 2, because I believe it is the single most underrated detail in this entire method. For now, just hold onto this: nothing ages an outfit faster than clothes that do not sit right on your particular body.

2. Color harmony

This is not about memorizing color theory or owning a color wheel app. It is about choosing colors that agree with each other instead of quietly competing for attention. A polished woman is rarely wearing five different colors at once. She is usually wearing two, maybe three, working together on purpose, even if she never consciously thought about why it worked. We will build this skill properly in Chapter 3.

3. Condition and care

Wrinkled fabric. Faded color. Bobbled knitwear. Scuffed shoes. This is the detail people notice without ever realizing they noticed it — it registers as a feeling, not a specific observation. A five-dollar top that is clean, pressed, and cared for will always look more expensive to the eye than a fifty-dollar top that looks tired and neglected.

4. Grooming

Your outfit is not the only thing people see, even though it is easy to focus all your attention there. Neat hair, clean nails, a fresh, rested-looking face — these finish the picture your clothes started. You do not need an elaborate routine here. You need a consistent one, which we'll build in Chapter 7.

5. Restraint

This is the detail that surprised me the most, because it went against everything I assumed about "dressing up." Elegant women are not wearing everything they own at once. One statement piece. One focal point. Everything else supports it quietly, almost invisibly. More is rarely more. More is usually just more — more noise, more clutter, less clarity about what you're actually trying to say with the outfit.

That is it. Fit. Color. Condition. Grooming. Restraint. Five things. Not fifty, not some overwhelming checklist requiring a whole closet overhaul. Five things you can start applying today, with clothes you already own.

The 5 Details icon chart

YOUR QUICK WIN — DO THIS BEFORE YOU READ ANY FURTHER

I do not want you to just read this chapter and move on, filing it away as "interesting" and forgetting it by tomorrow. I want you to feel a real difference today, in the next ten minutes, before you keep reading a single page further.

Here is what I want you to do right now.

Go to your wardrobe and pull out one outfit you already planned to wear this week — nothing special, nothing new, just something ordinary and already in rotation. Lay it out, or put it on if you can.

Now run it through the five details, one at a time, slowly:

  • Fit — Is anything pulling, gaping, or hanging in a way that does not flatter you? If yes, is there a quick fix available right now — tucking it in, rolling the sleeves, belting the waist?
  • Color — Are you wearing more than three colors right now? If so, could you remove one item to simplify the palette?
  • Condition — Is everything clean and pressed? If something is wrinkled, is there time to iron or steam it before you wear it today?
  • Grooming — Does your hair, skin, or nails need five minutes of attention to match the effort of the outfit?
  • Restraint — Are you wearing more than one "statement" piece at once? If so, choose your favorite one and set the rest aside for today.

Make one change. Just one. Fix the fit, remove one color, or take off one accessory. Do not try to fix all five at once — that is not the point of this exercise.

Then look in the mirror.

That small shift you just felt — that is not luck, and it is not about money. That is the Affordable Elegance Method already working, even before we go a single page deeper into the details. I promise you, it only gets clearer and more automatic from here.

YOUR ACTIONABLE STEP: THE 5-DETAIL AUDIT

I want you to keep this checklist somewhere you will actually see it every day — the inside of your wardrobe door, a note on your phone lock screen, a sticky note on your mirror, wherever genuinely works for your life. Before you leave home each day, run through it quickly:

  • Fit — Does everything sit correctly on my body right now, today?
  • Color — Am I wearing colors that work together, not against each other?
  • Condition — Is everything clean, pressed, and visibly cared for?
  • Grooming — Do I look as put-together as my outfit is trying to look?
  • Restraint — Have I let one piece lead the outfit, instead of everything competing for attention at once?

This is not about achieving perfection every single morning of your life. Some days you will only have time to fix one thing on this list, and that is still real progress, not failure. Over time, this audit will stop being something you consciously think through and start being simply how you get dressed, without even reaching for the checklist anymore.

In the next chapter, we slow down on that very first detail — fit — because it deserves far more than a quick summary. I am going to walk you through exactly how to check it, every time, without guessing.

THE AFFORDABLE ELEGANCE METHOD
CHAPTER TWO

The Perfect Fit Secret

I mentioned in the last chapter that fit matters more than almost anything else in your wardrobe. Now I want to slow all the way down and show you exactly why, because I genuinely believe this is the most underrated detail in the entire method — the one that quietly does more work than color, accessories, or anything else we will cover.

Here is something I did not understand for years, and it took me embarrassingly long to figure out: two women can wear the exact same blouse, in the exact same size, and one will look effortlessly polished while the other looks unfinished and slightly uncomfortable. The difference is almost never the blouse itself. It is the fit.

I used to think fit and size were the same thing. They are not. Fit is not the number printed on the tag. It is how the fabric actually sits on your particular body, today, right now, in this season of your life. A "medium" that fit you perfectly two years ago might pull differently across your shoulders now, or hang differently at your hips. A dress that looked flawless on the mannequin in the store might sit completely differently once it is on your real, moving, breathing body. None of this is a flaw in you. It is simply a mismatch between the garment and your body in this specific moment, and mismatches like this are almost always fixable — often without spending a single extra dollar on new clothes.

Why Fit Matters More Than Fabric or Brand

When something fits well, your eye reads it as intentional, as if it was made specifically for you, even if it came from the clearance rack. When something fits badly, your eye reads it as an accident — something grabbed in a hurry, something that does not quite belong — even if the fabric is beautiful and the color is exactly right.

Think about it this way for a moment. A well-fitted, plain white cotton shirt will almost always look more expensive to the eye than a designer blouse that pulls awkwardly at the buttons or hangs shapelessly off the shoulders. Fit is the very first thing people notice about an outfit, even if they could never quite tell you why an outfit looks "off" or "not quite right." Most people cannot name what bad fit looks like. They can only feel that something is wrong.

This is exactly why my aunty's advice stuck with me so deeply, and why I still think about it years later. She never once mentioned a brand name, a price tag, or a trend. She talked about the line of a shoulder seam. She talked about where a waistband should sit. She was talking about fit the entire time — she simply never used that specific word, because to her, it was not a technical concept. It was just common sense, the kind of thing her own mother had taught her.

What Good Fit Actually Looks Like

You do not need a sewing background, a tailoring certificate, or years of experience to spot bad fit. You just need to know precisely where to look, and once you know, you will start seeing it everywhere — in your own mirror and in other people's outfits alike.

  • At the shoulders — the seam of a top should sit right at the edge of your shoulder bone, not halfway down your upper arm, and not pulling up uncomfortably toward your neck.
  • At the waist — if a top, dress, or jacket has any defined waist shaping, it should sit at your natural waistline, not riding up toward your ribs or drooping down toward your hips.
  • At the hem — sleeves and trouser hems should end at a deliberate, chosen point on your body, not an accidental one.
  • Across the chest and back — this is the one most women miss. Watch closely for pulling, gaping between buttons, or fabric that strains uncomfortably when you move naturally, reach, or sit down.

Cheap, Fast Fixes for Common Fit Problems

  • Tucking — a shirt that runs slightly too long or boxy often transforms completely the moment you tuck it in.
  • Belting — adding a belt at your natural waist instantly creates shape and structure.
  • Rolling — sleeves that run a little too long can be rolled once or twice to create a cleaner line.
  • Tailoring — for pieces you genuinely wear often, a small tailoring investment is almost always cheaper long-term than replacing the item entirely.
Front, side, back fit-check diagram

TOOL: THE 60-SECOND FIT-CHECK METHOD

  1. Step 1 — Front check (15 sec): Shoulders sitting correctly? Any pulling across chest or stomach?
  2. Step 2 — Side check (15 sec): Hemline at a flattering point? Waist defined, not hidden?
  3. Step 3 — Back check (15 sec): Any pulling or bunching you can't see from the front?
  4. Step 4 — Movement check (15 sec): Raise your arms, sit down. Does everything still sit correctly?

If you discover a problem during any of these four steps, go straight back to the fixes above. Tuck it. Belt it. Roll it. Or simply make a mental note that this particular piece is a strong candidate for a visit to a tailor.

YOUR ACTIONABLE STEP

Choose three items you wear often — one top, one pair of trousers, and one dress or skirt. Run each one through the full 60-Second Fit-Check today, without skipping any of the four steps.

For anything that fails the check, apply one fix immediately: tuck it, belt it, or roll it. For anything that keeps failing no matter what small fix you try, set it aside honestly as a tailoring candidate.

In the next chapter, we build directly on this foundation. Once your clothes fit you properly, color becomes the very next detail that instantly signals elegance to anyone looking at you.

THE AFFORDABLE ELEGANCE METHOD
CHAPTER THREE

Elegant Color Combinations Without Buying Anything New

Once fit is right, color is the very next thing people notice about an outfit — often before they even consciously register what specific pieces you are wearing. The eye processes color before it processes detail, which is exactly why getting this one thing right carries so much visual weight.

I used to think color was the hardest, most mysterious part of getting dressed well. I would stand in front of my wardrobe, completely convinced that nothing "matched," even though I owned plenty of genuinely beautiful individual pieces. What I did not understand yet, and what took me an embarrassingly long time to learn, was that matching was never actually the goal I should have been chasing. Harmony was the real goal. And harmony, it turns out, is far more forgiving and far more achievable than strict matching ever was.

Why Color Coordination Reads as "Expensive" So Fast

Think for a moment about the women you have personally admired for looking effortlessly put-together. I would guess, with fairly high confidence, that most of them were not wearing loud, complicated, five-color combinations. They were almost certainly wearing two colors, or maybe three at most, working together with clear intention.

When colors genuinely agree with each other, your eye reads the entire outfit as one single, cohesive thought. When colors compete instead, your eye gets confused about where it is supposed to look first, and the whole outfit starts to feel chaotic and unresolved, even if every individual piece within it is beautiful on its own terms.

This is one of the fastest, cheapest ways available to make an affordable outfit look genuinely expensive, because it costs you absolutely nothing extra. You already own the colors sitting in your closet right now. You simply have not been combining them with real intention yet — and that is a skill, not a talent, which means it can be learned.

Simple, Forgiving Color Pairing Rules

  • Neutrals plus one accent — build the majority of your outfit from black, white, cream, beige, navy, gray, or brown, then let exactly one color stand out clearly against that neutral base.
  • Tonal dressing — wear different shades within the same color family, head to toe, for a quiet, sophisticated harmony.
  • The 60-30-10 idea, simplified — one main color leads the outfit, one color supports it quietly, and one small accent finishes the whole look (a scarf, a handbag, or earrings).

Common Color Mistakes That Make Outfits Look Cheap or Busy

  • Wearing four or five entirely unrelated colors at once, with no single clear "leader" color.
  • Pairing colors of the exact same brightness and intensity level, which fight each other for attention.
  • Ignoring undertones — pairing a warm-toned piece with a cool-toned piece can create a subtle clash even when the colors seem, on paper, like they should work together.

TOOL: COLOR PAIRING REFERENCE CHART

Use this chart directly against your own wardrobe, right now, while reading this chapter.

Color Pairing Reference Chart

YOUR ACTIONABLE STEP

Open your wardrobe right now and pick one base color you already own multiple pieces in. Using the chart above, build three complete outfits from that base color and its recommended pairings, using absolutely nothing beyond what you already own.

In the next chapter, we turn to the detail my aunty taught me that quietly finished off everything else in her own outfits — the simple accessory rule.

THE AFFORDABLE ELEGANCE METHOD
CHAPTER FOUR

The Simple Accessory Rule

This is the single piece of advice from my aunty that changed the way I get dressed forever, more than any other single lesson in this entire guide.

She told me, standing in her kitchen at that family gathering, "Repeat one metal tone, and let one piece be the focal point. Everything else should support it quietly." She said it so simply, almost in passing, that I nearly missed how important it actually was.

That single sentence solved something I had been quietly struggling with for years without ever being able to name it properly. I used to wear gold earrings with a silver watch and a rose gold bracelet, all at the same time, and then genuinely wonder why my outfit felt cluttered and unfinished even though every individual piece of jewelry was, on its own, genuinely lovely and well-chosen.

The One Metal Tone, One Focal Point Rule

Here is exactly how this rule works in practice. Choose one metal tone for the day — gold, silver, or rose gold — and keep every single piece of jewelry you wear in that same tone, without exception. This one small discipline alone instantly makes an outfit look far more coordinated and intentional, even if you change absolutely nothing else about what you are wearing.

Then, separately, choose one focal point for the outfit. This is the one piece that is allowed to genuinely stand out and draw attention: a statement necklace, a pair of bold earrings, a structured handbag, or an interesting, eye-catching pair of shoes. Everything else you wear that day should be deliberately quiet enough to let that one chosen piece lead the whole look.

If your earrings are bold and eye-catching, let your necklace stay simple or disappear entirely for the day. If your handbag is your chosen statement piece, let your jewelry stay minimal and understated. Elegant women, in my experience, are rarely wearing five loud things at once. They are usually wearing exactly one.

A Quick Example

Imagine a plain black dress, nothing special on its own. Add gold hoop earrings, a gold watch, and a gold bangle — one single metal tone carried consistently throughout. Then let a structured tan handbag serve as your one chosen focal point for the day, and keep absolutely everything else simple and quiet around it.

That is the entire formula, in full. One tone. One focal point. Nothing competing against anything else for attention.

Example outfit — one metal tone, one focal point rule Statement Accessories — one handbag, three styles

YOUR ACTIONABLE STEP: THE "REMOVE ONE THING" EXERCISE

Before you leave the house today, get fully dressed exactly as you normally would, accessories and all. Then stop, look carefully in the mirror, and ask yourself honestly: which one accessory could I remove right now, and the outfit would still feel completely finished?

Take it off.

This single habit — pausing deliberately before you walk out the door and removing exactly one thing — is often, in my own experience, the single fastest way to turn a good outfit into a genuinely elegant one.

In the next chapter, we look closely at the specific mistakes that quietly undo all of this careful work, even on clothes that are already, technically, quite expensive.

THE AFFORDABLE ELEGANCE METHOD
CHAPTER FIVE

Styling Mistakes That Make Even Expensive Clothes Look Cheap

I want to be honest with you about something I have observed repeatedly over the years. I have seen women wearing genuinely expensive clothing still manage to look unfinished and slightly off, and I have seen women wearing five-dollar pieces look completely elegant and put-together. The difference, almost every single time, comes down to a small, specific handful of mistakes.

Here are the ones I see most often in others, and the ones I personally had to consciously unlearn in myself, one at a time.

Wrinkled or Uncared-For Clothing

This, without question, is the fastest possible way to undo an otherwise expensive-looking outfit. A wrinkled blouse reads instantly as careless to the eye, no matter how well the piece fits your body or how genuinely nice the underlying fabric is. A quick pass with an iron, or a few minutes with a handheld steamer, changes the entire impression an outfit makes.

Mismatched Hardware

Gold buttons on a handbag sitting right next to silver jewelry. A rose gold watch paired with gold earrings. This is really the same principle from Chapter 4 showing up again as a visible mistake whenever it gets ignored. Mismatched metals are subtle, but your eye still notices the underlying disagreement, even when you personally cannot name exactly what feels wrong.

Wrong Proportions

Wearing everything oversized at once, or everything tightly fitted at once, without any deliberate contrast between the two, tends to read as unintentional rather than stylish. A relaxed, loose-fitting top usually needs a more fitted bottom to balance it visually, and a fitted, structured top can comfortably carry a looser, more relaxed trouser or skirt.

Over-Accessorizing

We covered this principle already in the previous chapter, but it genuinely deserves repeating here, because it remains one of the most common mistakes I see, over and over. A bold necklace, bold earrings, a heavily patterned bag, and a busy pair of shoes, all worn together at once, will always look more cluttered than expensive, regardless of how much any individual item actually cost.

A Real Example

I once wore a genuinely beautiful satin blouse — one of the nicer, more expensive individual pieces I owned at the time — paired with wrinkled trousers and visibly scuffed shoes. Nobody complimented that outfit, not once, all day. Weeks later, I wore a plain, inexpensive cotton shirt, properly pressed trousers, and clean, well-kept shoes, finished with simple gold jewelry. That second outfit got noticed and complimented multiple times. The blouse, on paper, was the more expensive individual piece. The second outfit, taken as a whole, looked more expensive.

Before and after styling comparison

YOUR ACTIONABLE STEP: THE MISTAKE CHECK

Before leaving home each day, glance over yourself one final time in the mirror and ask, quickly, in sequence:

  • Is anything visibly wrinkled?
  • Are my metals matching consistently?
  • Is there a genuine balance between fitted and relaxed pieces?
  • Have I removed anything extra, per the accessory rule from the last chapter?

This entire check takes well under a minute to run through, and it reliably catches almost everything on this list before you ever walk out the door.

In the next chapter, we shift our focus away from what to avoid and toward how to shop smart whenever you do decide you want to add something genuinely new to your wardrobe.

THE AFFORDABLE ELEGANCE METHOD
CHAPTER SIX

Strategic Shopping on a Limited Budget

I am not against buying new clothes, and I want to be clear about that upfront. I am against buying them randomly and hopefully, the way I used to for years without realizing how much money it was quietly costing me.

I remember standing in a store, years ago now, holding a blouse I genuinely loved on the hanger, with absolutely no clear idea what I already owned that it might realistically pair with. I bought it anyway, swept up in the excitement of the moment. It sat untouched in my closet for well over a year before I finally wore it even once. That one blouse taught me more about shopping wisely than any amount of general advice ever could have, because I learned the hard way, through real wasted money, that simply liking something inside a store means very little if I cannot immediately picture it working with anything I already own at home.

Once you genuinely understand fit, color, accessories, and the common mistakes to avoid, shopping itself becomes a completely different experience. You stop buying individual pieces and hoping, somehow, that they will work with everything else later. You start buying pieces you already know, with real confidence, exactly how you will use.

How to Spot Pieces That Look More Expensive Than Their Price

  • Fabric weight — physically pick up the garment and feel its actual weight. Cheap-feeling fabric is usually thin, stiff, or overly shiny in a synthetic way. Fabric with real substance and a natural drape reads as higher quality, regardless of price.
  • Structure — hold a blazer, top, or dress up to the light, or lay it flat. Does it genuinely hold its own shape, or does it look flimsy and shapeless?
  • Finishing details — check the seams, buttons, and zippers. Loose threads, cheap plastic buttons, or crooked stitching quietly give away a low-quality piece.

One Guiding Principle for Where to Shop

Shop specifically for pieces that work with what you already own, not pieces that only work alongside something else you have not bought yet. Before purchasing anything new, take a moment to picture it paired with at least two specific things already hanging in your wardrobe. If you genuinely cannot picture it clearly, put it back on the rack. This one simple principle, practiced consistently, will save you significantly more money over time than any single sale ever will — and it is the exact principle that blouse eventually taught me, at real financial cost.

Fabric close-up comparison — quality cues

YOUR ACTIONABLE STEP: THE PRE-SHOPPING CHECKLIST

  • Can I picture this working with at least two things I already own?
  • Does the fabric feel genuinely substantial, not thin or flimsy?
  • Are the seams, buttons, and overall finishing clean and well-made?
  • Does this fit properly, right now, on my actual body, as it currently is?

If a potential purchase passes all four of these questions, it is genuinely worth considering. If it fails even one of them, let it go, no matter how much you like it in the moment.

In the final chapter, we finish this method with the small grooming details that quietly complete everything we have already covered together.

THE AFFORDABLE ELEGANCE METHOD
CHAPTER SEVEN

Grooming and Finishing Touches

We have now covered fit, color, accessories, common mistakes to avoid, and smart shopping. But there is one more essential layer that ties everything else together, and it costs the least of everything we have discussed so far: how genuinely put-together you look beyond just your clothes themselves.

The Finishing-Touch Rule

An outfit reads as "expensive" to the eye when it looks fully complete, and completeness, in my experience, usually comes down to one small, deliberate detail: neat hair, clean shoes, or a light, pleasant fragrance. You do not need all three of these to be elaborate or time-consuming. You need at least one of them to be genuinely deliberate and consistent.

My aunty's own finishing touch was always her shoes — simple, low-heeled, and immaculately clean, no matter what else she had on. That one consistent detail did more for her overall look than any accessory ever could.

Low-Cost Grooming Habits That Make a Real Difference

  • Neat hair — even a simple hairstyle looks polished the moment it is tidy and intentional.
  • Clean, presentable nails — bare, clean, and well-kept nails count every bit as much as freshly polished ones.
  • Clean shoes — scuffed or dirty shoes undo an otherwise elegant outfit faster than almost anything else.
  • A fresh face — you do not need a full face of makeup, simply look rested, clean, and cared for.

None of these particular habits require a large budget or a significant time investment. What they genuinely require instead is consistency — turning each one into a habit rather than an occasional afterthought.

The Finishing Touch — simple details, big difference

YOUR ACTIONABLE STEP: THE 5-MINUTE PRE-LEAVING-HOME ROUTINE

  • Check your hair — smooth down or quickly restyle anything out of place.
  • Wipe down or visually check your shoes for scuffs or dust.
  • Glance at your nails and hands.
  • Apply a light fragrance or moisturizer as your final touch.

This entire routine takes considerably less time than deciding what to actually wear, and in my own experience, it is very often the true difference between simply looking "put together" and looking genuinely polished.

You now have the complete Affordable Elegance Method laid out in full: fit, color, accessories, avoiding the common mistakes that undo good outfits, smart and strategic shopping, and grooming. Every single piece you already own has more potential inside it than you may have previously realized.

Next, we move into your two bonuses — the Outfit Formula Cheat Sheet and the 7-Day Look-Put-Together Challenge — so you can put absolutely everything you have just learned into real, practical action, one day at a time.

THE AFFORDABLE ELEGANCE METHOD
BONUS ONE

The Expensive-Looking Outfit Formula Cheat Sheet

Keep this page nearby. This is your quick-reference guide for building a polished outfit in minutes, using everything you have learned so far.

The Basic Formula

1 fitted piece + 1 relaxed piece + 1 color story + 1 metal tone + 1 focal point

That is the entire formula. Let's break it down into ready-to-use combinations.

Everyday Formulas

Formula 1: The Classic Neutral

  • Fitted top (tucked) + tailored trousers
  • Neutral + one accent color (Chapter 3 chart)
  • One metal tone throughout
  • Focal point: structured bag or one statement earring

Formula 2: The Relaxed Polish

  • Relaxed blouse + fitted trousers or pencil skirt
  • Tonal color dressing (shades of the same color family)
  • Minimal jewelry, one tone
  • Focal point: clean, well-kept shoes

Formula 3: The Dress Formula

  • Well-fitted dress (run the 60-Second Fit-Check first)
  • Belt at the natural waist for shape
  • One metal tone jewelry
  • Focal point: your choice of bag or earrings, not both

Formula 4: The Trouser and Blazer Combo

  • Structured blazer + fitted trousers, or trouser + relaxed blazer
  • Neutral base, one accent piece
  • One metal tone
  • Focal point: the blazer itself — keep jewelry minimal

Formula 5: The Casual Elevated Look

  • Well-fitted jeans + tucked-in blouse or shirt
  • Neutral plus accent color
  • One metal tone
  • Focal point: one statement accessory (bag, belt, or shoes)
Formula 5: The Casual Elevated Look — cheat sheet Bonus 1 Cheat Sheet Card and Bonus 2 7-Day Style Confidence Tracker

QUICK REMINDERS BEFORE YOU WALK OUT

  • Run the fit check if you have not worn the piece in a while.
  • Choose your color story before you choose your accessories.
  • Pick one metal tone and stay with it.
  • Pick one focal point and let everything else stay quiet.
  • Do the mistake check: wrinkles, hardware, proportions, extras.

Pin this page, screenshot it, or keep it open while you get dressed. Over time, you will not need it — these formulas will simply become how you naturally put things together.

THE AFFORDABLE ELEGANCE METHOD
BONUS TWO

The 7-Day Look-Put-Together Challenge

This challenge is designed to help you apply everything from this guide, one small step at a time. You do not need a new wardrobe to complete it. You only need what you already own and about ten to fifteen minutes each day.

Do not skip ahead. Each day builds on the one before it.

Day 1 — The Fit Reset

Task: Run the 60-Second Fit-Check Method on three pieces you wear often. Apply one quick fix.

Reflect: Which piece surprised you most?

Day 2 — The Color Story

Task: Build one outfit using the Color Pairing Reference Chart.

Reflect: Did narrowing your color choices make getting dressed easier or harder?

Day 3 — The Accessory Edit

Task: Apply the one metal tone, one focal point rule. Do the "remove one thing" exercise.

Reflect: What did you remove, and did the outfit feel more finished?

Day 4 — The Mistake Check

Task: Review the Mistake Check list before dressing. Catch and fix at least one mistake.

Reflect: Which mistake do you catch yourself making most often?

Day 5 — The Formula Practice

Task: Choose one formula from your cheat sheet and build today's outfit around it exactly.

Reflect: Did having a formula make getting dressed faster?

Day 6 — The Grooming Habit

Task: Complete the 5-Minute Pre-Leaving-Home Routine. Be especially deliberate about one finishing touch.

Reflect: Did you notice people responding differently to you today?

Day 7 — The Full Method

Task: Bring everything together — fit check, color story, accessory rule, mistake check, grooming routine — start to finish.

Reflect: What is different about how you feel, compared to Day 1?

7-Day Style Confidence Tracker

AFTER THE CHALLENGE

You do not need to do all five steps perfectly every single day for the rest of your life. Some mornings you will only have time for the fit check. Other days you will remember the accessory rule but forget the mistake check. That is completely fine.

The goal was never perfection. The goal was to build the habit of asking the right questions before you get dressed, instead of standing in front of your wardrobe feeling lost the way I once did.

You already had everything you needed. Now you know how to use it.

Closing Note From Deborah

I want to leave you with something before you close this guide.

A while back, I shared this same method — quietly, one conversation at a time — with a few women in my own life. Women who, like you, had wardrobes full of clothes and still felt like something was missing. One realized two small tailoring fixes gave her more outfits than five new purchases ever had. Another built an entire week of outfits around colors she'd been ignoring for years. Their wardrobes were different from mine, and from each other's, but the same five details worked for all of us.

That is what convinced me this method wasn't just something that worked for me once. It is something that works because it is simple, repeatable, and true regardless of your size, your budget, or your closet.

You already have what you need. You always did. What you were missing was never more clothes — it was a way of seeing what you already own.

Go back to your wardrobe. Start with one outfit. Run it through the five details. Then do it again tomorrow. That is the whole method. That is all it ever was.

With love,
Deborah

What Women Are Saying

Real experiences from women applying the Affordable Elegance Method.

Juliet Omoregie
Benin City, Nigeria · 2 weeks ago
"I used to just copy outfits I saw on Instagram, buying pieces that never actually worked with my real life. The shopping chapter taught me to slow down and really check the fit, fabric, color, and versatility before buying anything. Now I shop way less, but I make better choices — and honestly, I feel so much happier with my wardrobe."
Belinta White
"This guide helped me stop 'saving' my good clothes for special occasions only. I finally learned how to dress them down and mix them into everyday looks. The first Sunday I tried it, two women at church told me I looked elegant!"
Michelle Adeyemi
Toronto, Canada · 2 weeks ago
"As a busy mom, I needed advice I could actually use in the rush of the morning. I followed the grooming and finishing-touch routine for one week, and even my basic jeans and blouses started looking more put-together. My husband complimented me twice that week — without even knowing I was following a guide!"

What Women Are Saying

Real experiences from women applying the Affordable Elegance Method.

Sade Ajulo
"I always layered on too many accessories because I thought it made an outfit look more expensive. The simple accessory rule taught me to edit down instead. Within a few days, my outfits looked cleaner and more elegant, and getting dressed stopped feeling so confusing."
Comfort Agusi
Manchester, United Kingdom · 10 days ago
"The color-combination section made getting ready for work so much easier. I put together five outfits using clothes I already owned, and everything just looked more coordinated. I feel more confident, and I did not even spend money on a new shopping trip."
Sarah Bello
Atlanta, United States · 1 week ago
"I used to buy new clothes for every event, but something always felt off. The fit checklist showed me that two of my favorite dresses just needed small alterations. Once I restyled them with simpler accessories, my sister actually asked if I had bought new outfits. This guide really opened my eyes."

Your wardrobe does not need to be bigger. It needs to work better for you.

AFFORDABLE ELEGANCE ACTION WORKBOOK1 OF 4
WORKBOOK 1 OF 4

Your 20-Minute Wardrobe Edit

Choose one small section of your wardrobe. The goal is clarity, not a complete closet overhaul.

1
Choose ten pieces
Select items you wear often or want to wear more.
2
Run the five-detail test
Check fit, fabric condition, color harmony, grooming readiness, and restraint.
3
Create three outfits
Write three combinations using only the pieces that passed your check.
AFFORDABLE ELEGANCE ACTION WORKBOOK2 OF 4
WORKBOOK 2 OF 4

Plan Five Polished Outfits

Use this page to remove weekday guesswork and make your existing wardrobe work harder.

1
Choose your base
Pick one neutral trouser, skirt, dress, or pair of jeans.
2
Add coordinated color
Choose one supporting color and one optional accent.
3
Finish with intention
Select one focal accessory and note the grooming detail that completes each look.
AFFORDABLE ELEGANCE ACTION WORKBOOK3 OF 4
WORKBOOK 3 OF 4

Your Smart Shopping Filter

Before buying anything new, pause and answer these questions honestly. A bargain is not a bargain if it remains unworn.

1
Does it fit today?
Check the shoulders, waist, hips, hem, and movement before considering the price.
2
Can I style it three ways?
Name three outfits using clothes and shoes you already own.
3
Will it still look good after care?
Inspect fabric, seams, closures, lining, and the care instructions.
AFFORDABLE ELEGANCE ACTION WORKBOOK4 OF 4
WORKBOOK 4 OF 4

Your 30-Day Elegance Promise

Write one simple commitment you can repeat for the next thirty days. Consistency will change your style faster than random shopping.

1
My daily habit
Choose one: prepare clothes at night, steam before wearing, follow the accessory rule, or complete the grooming check.
2
My weekly reset
Choose one day to plan outfits, care for shoes and bags, and return items to their proper places.
3
My promise to myself
Complete this sentence: I will look polished on my budget by…